
How to Configure Mailjet in Icegram Express
MaxSet up Mailjet API credentials in Icegram Express to send marketing newsletters and automated emails with high deliverability.
Mailjet is a European cloud-based email delivery service known for GDPR compliance, advanced analytics, and high deliverability.
Part 1: Add and Authenticate Your Domain in Mailjet
- Sign up or log in to your Mailjet account.
- In your account settings, navigate to Senders & Domains > Domains.
- Click Add Domain and enter your website’s domain name.
- Mailjet generates unique SPF and DKIM DNS TXT records. Add these records to your domain’s DNS host (e.g., Cloudflare, Route 53, or cPanel).
- Click Check Status in Mailjet until the domain is fully authenticated.
Part 2: Obtain Your API Key and Secret Key
- In your Mailjet account dashboard, go to Account Settings > Rest API > API Key Management.
- Copy your Primary API Key and your Secret Key.
Part 3: Configure Mailjet in Icegram Express
- In your WordPress admin, go to Icegram Express > Settings > Email Sending.
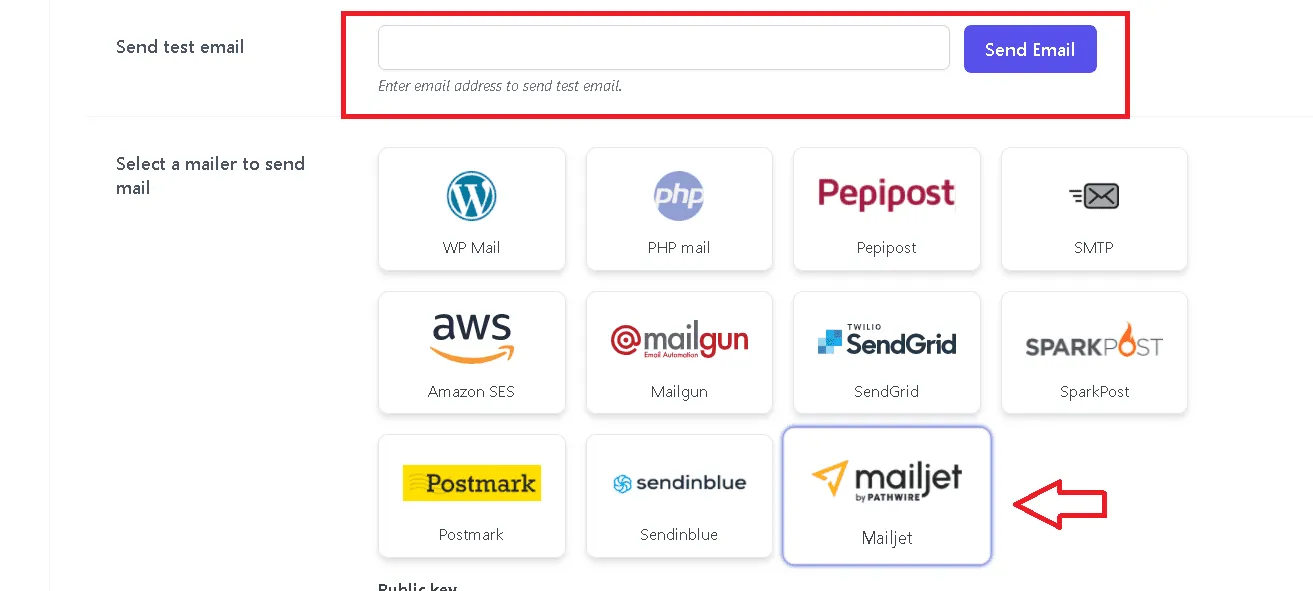
- Scroll to the Select a mailer to send mail section and select Mailjet.
- Enter your API Key and Secret Key.
- Confirm that your From Email under Settings > General matches the domain you verified in Mailjet.
- Click Save Settings.
- Use the Send Test Email tool to send a test message to your inbox.