

How to Create Your First Icegram Engage Campaign
Step-by-step walkthrough to creating, styling, and launching your first high-converting popup or message campaign in Icegram Engage.
Creating a campaign in Icegram Engage takes just a few minutes. A campaign groups one or more messages (such as a popup, header action bar, or messenger) along with their targeting and display rules.
Steps to Create a Campaign
-
Log in to your WordPress admin dashboard.
-
Navigate to
Icegram Engage→Campaignsand click Add New Campaign.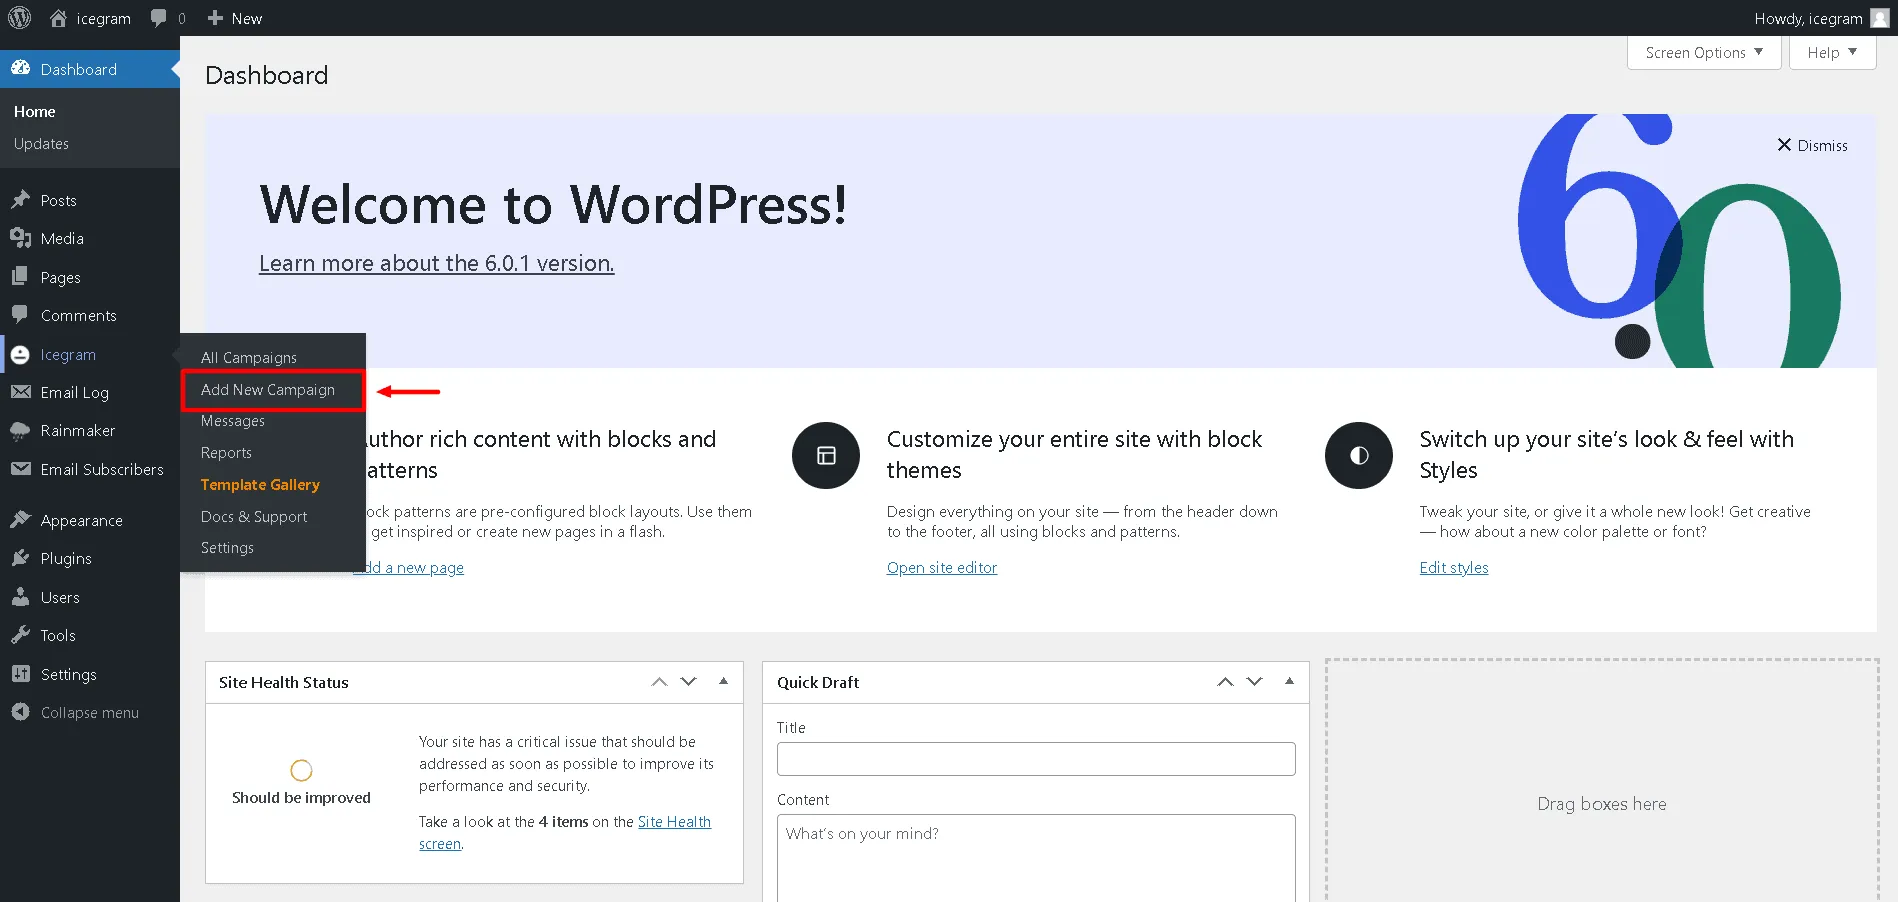
-
Enter a descriptive title for your campaign.
-
Choose a message template from the gallery or start with a blank message.
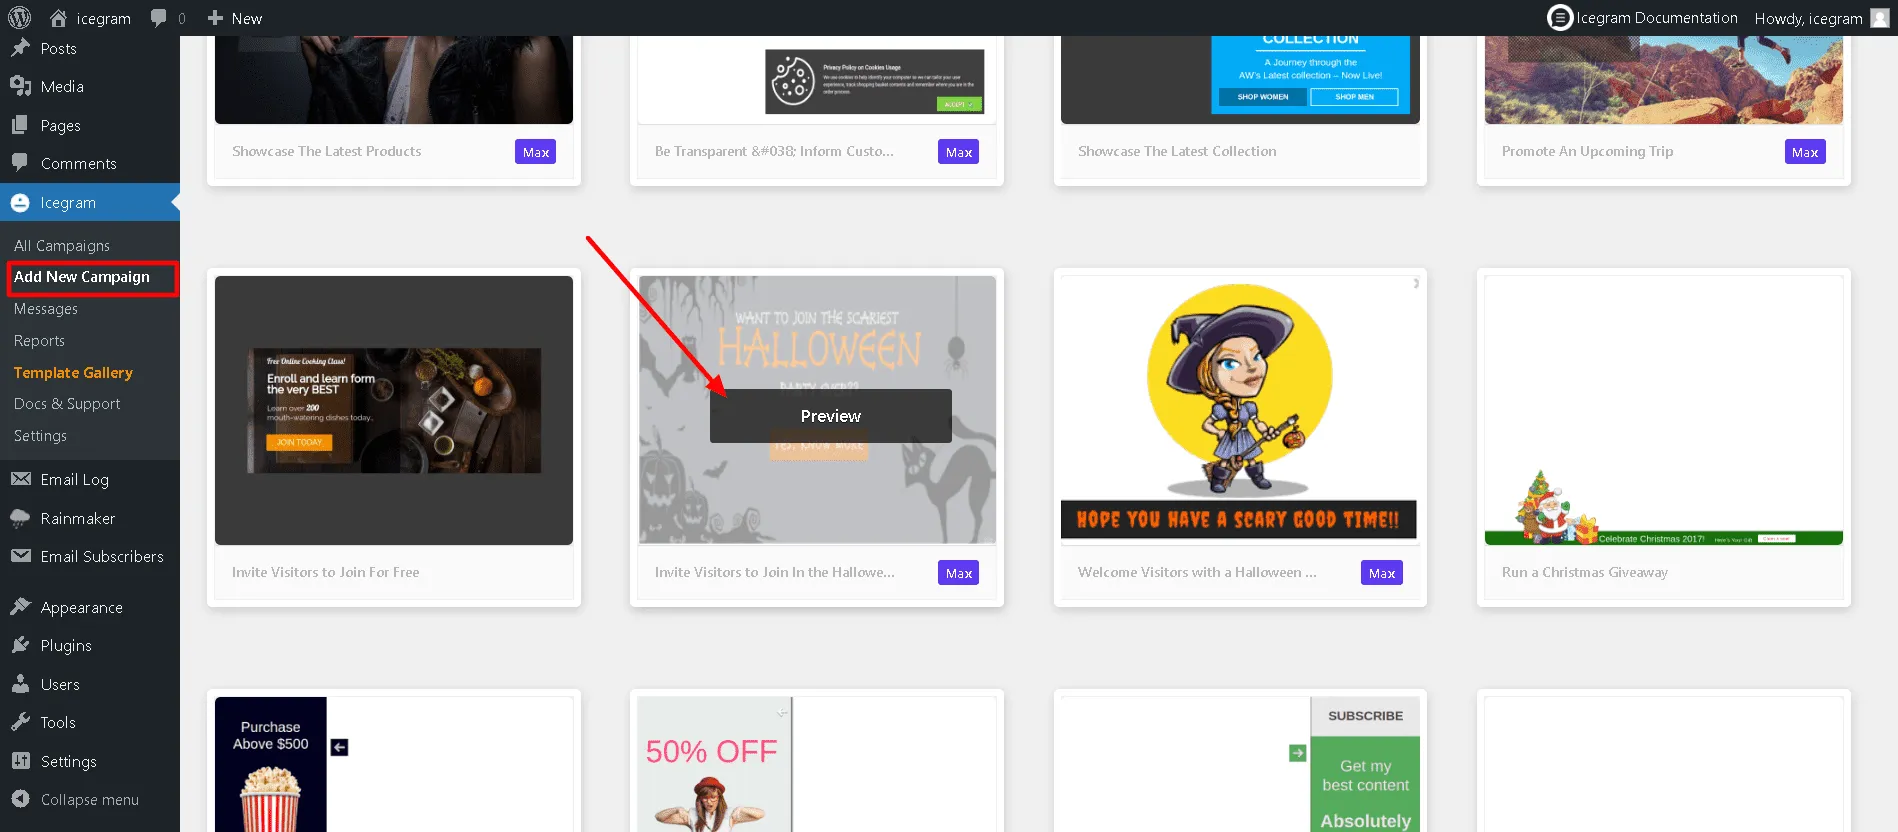
-
Customize your message content, headline, body copy, and Call to Action (CTA) button.
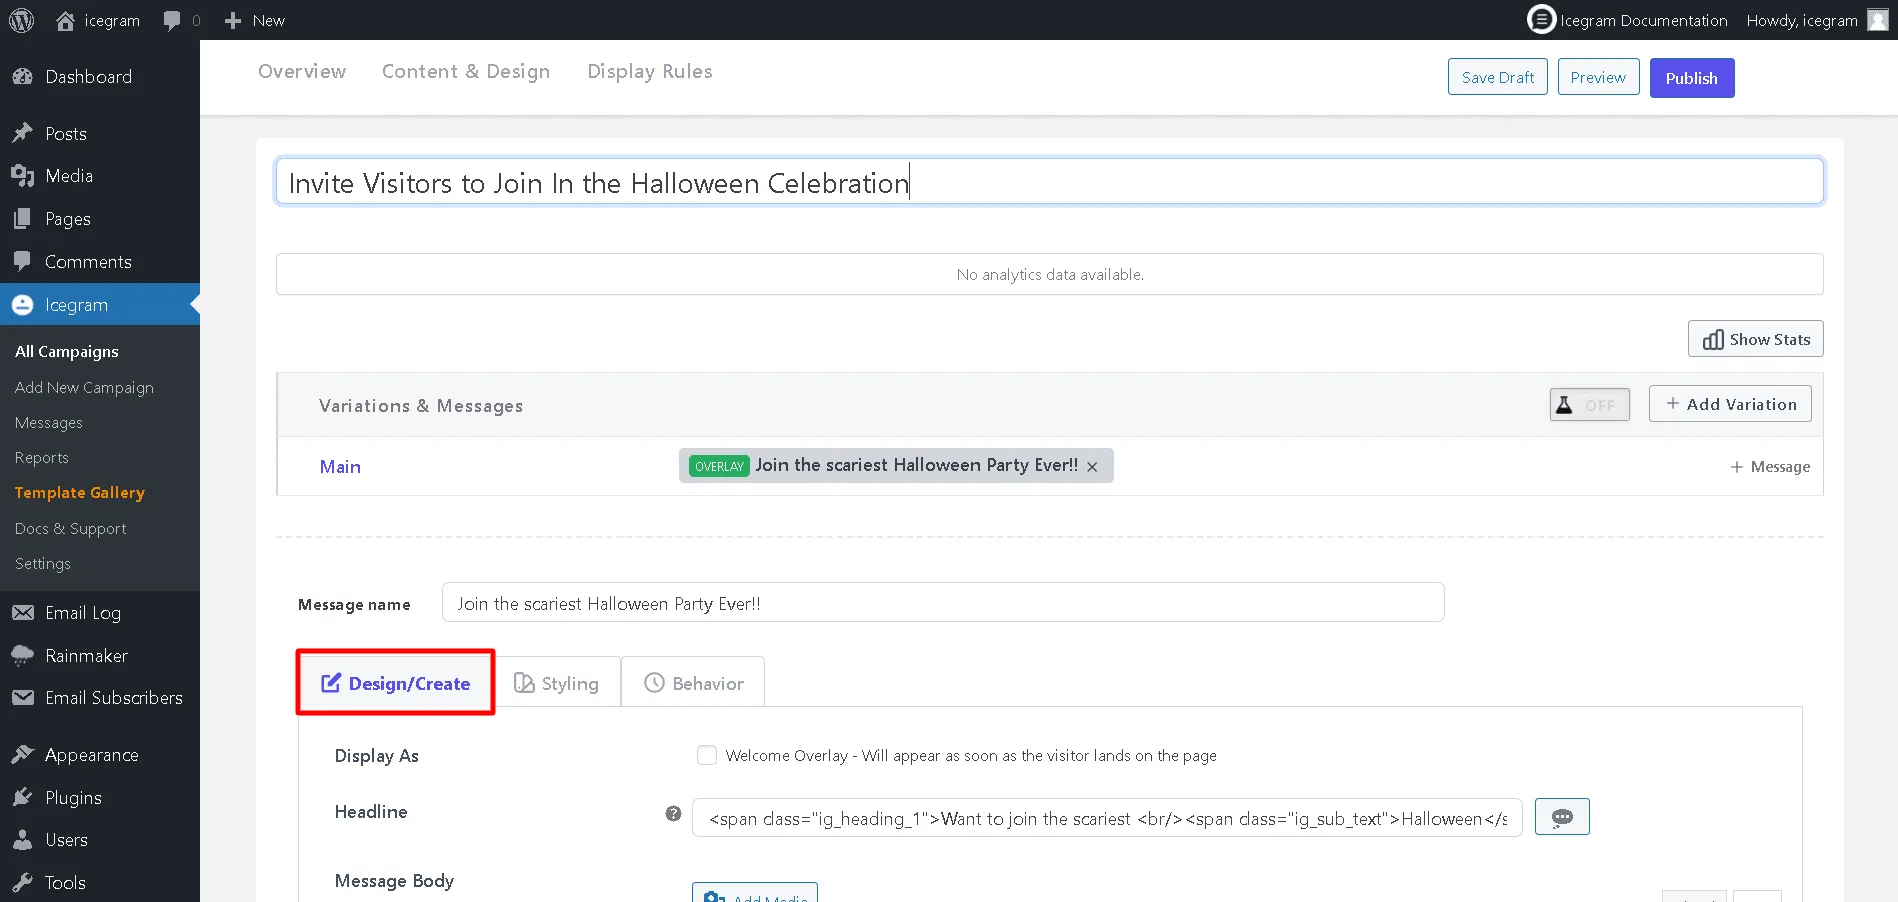
-
Configure Display Rules to choose Where (which pages) and When (e.g., immediately, after delay, or on exit intent) your message should trigger.
-
Click Save Draft to preview your campaign, or click Publish to make it live.