

How to Create and Manage Custom Fields
MaxCreate and manage custom subscriber fields in Icegram Express to collect phone numbers, dates, and personalized data to ensure high deliverability and...
Custom fields allow you to collect tailored subscriber information beyond standard name and email addresses—such as phone numbers, dates of birth, country, or interests. You can embed these fields into your subscription forms and use them for segmentation and merge tags.
Steps to Create a Custom Field
-
In your WordPress admin dashboard, navigate to
Icegram Express→Forms→Manage Custom Fields.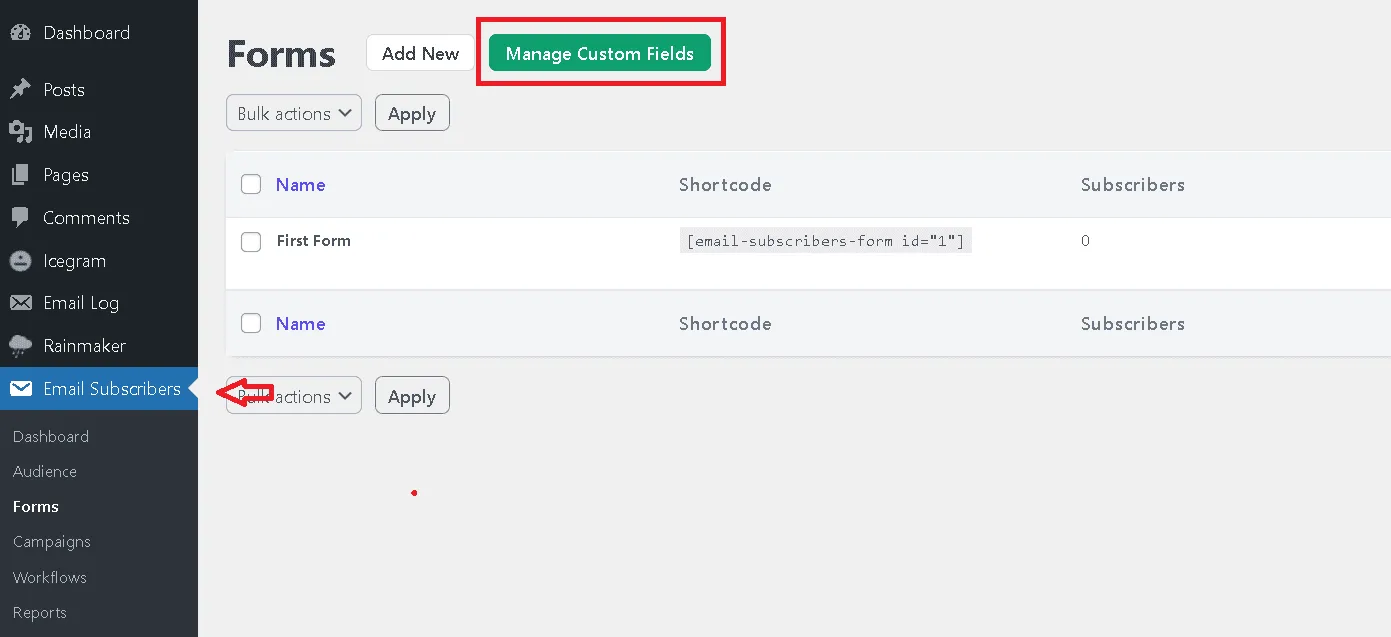
Manage Custom Fields screen in Icegram Express -
Click the Add New button.
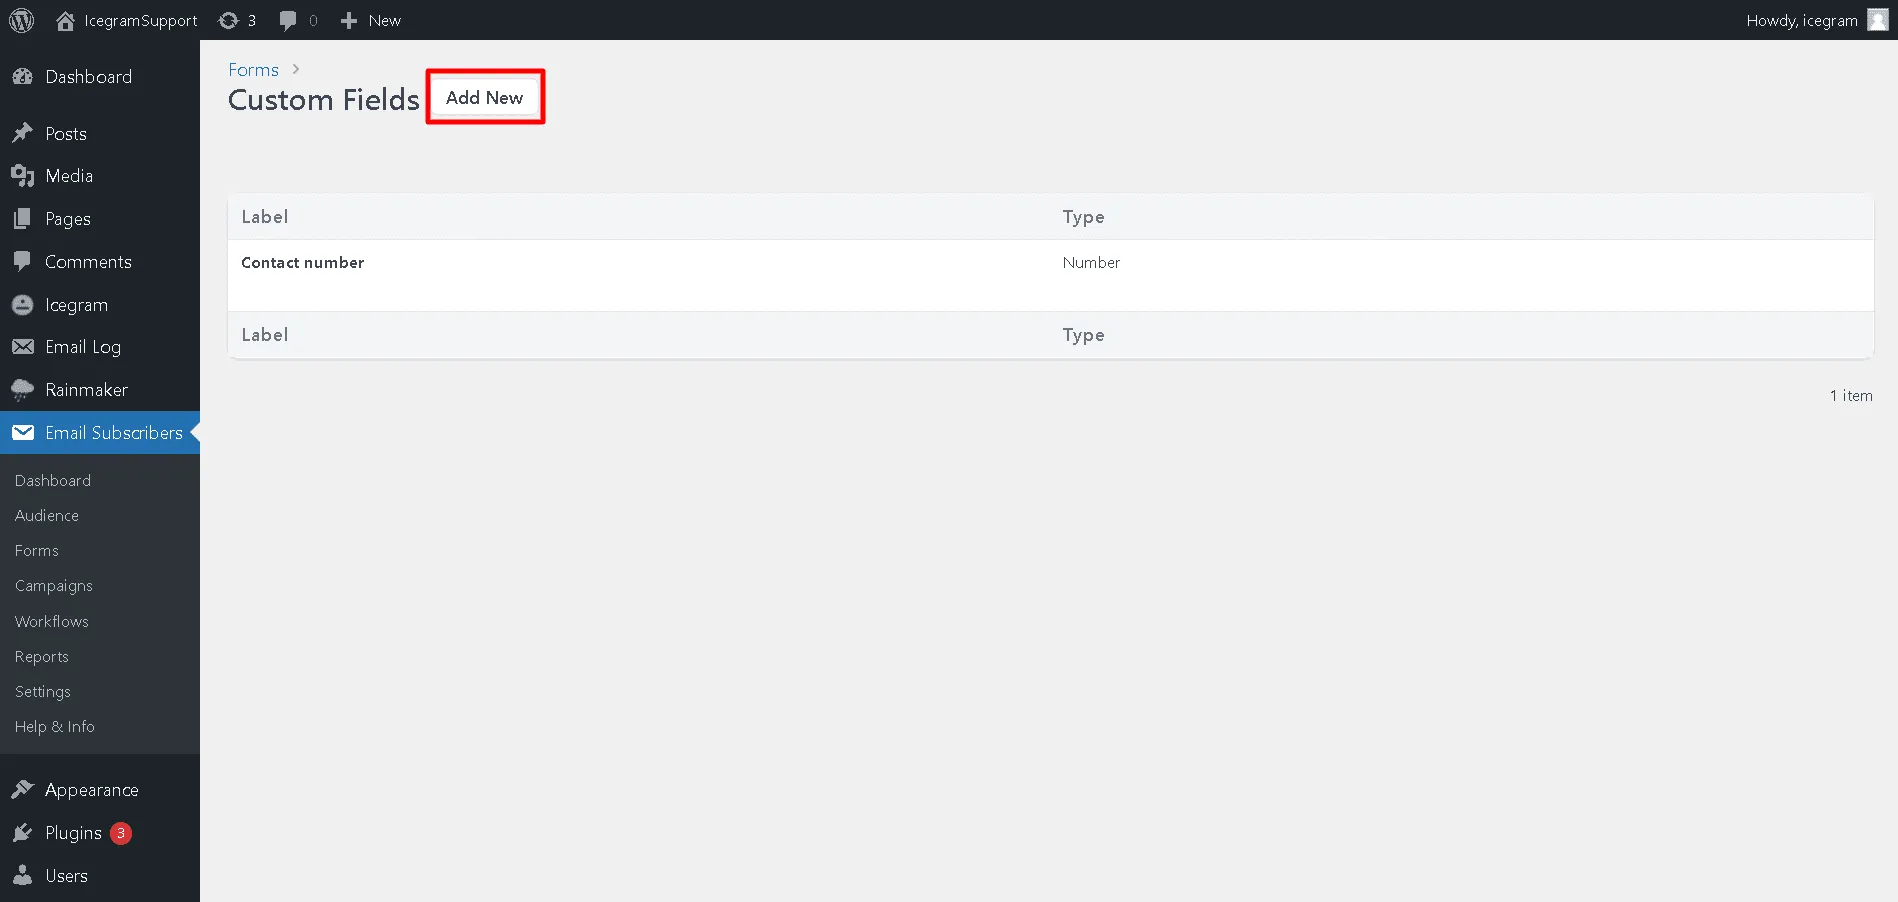
Add new custom field button -
Enter the field Label (e.g., Phone Number or Preferred Topic) and select the Type (Text, Number, Date, Radio Button, Dropdown, etc.).
If you select Radio Button or Dropdown, enter the selectable options in the box (one option per line).
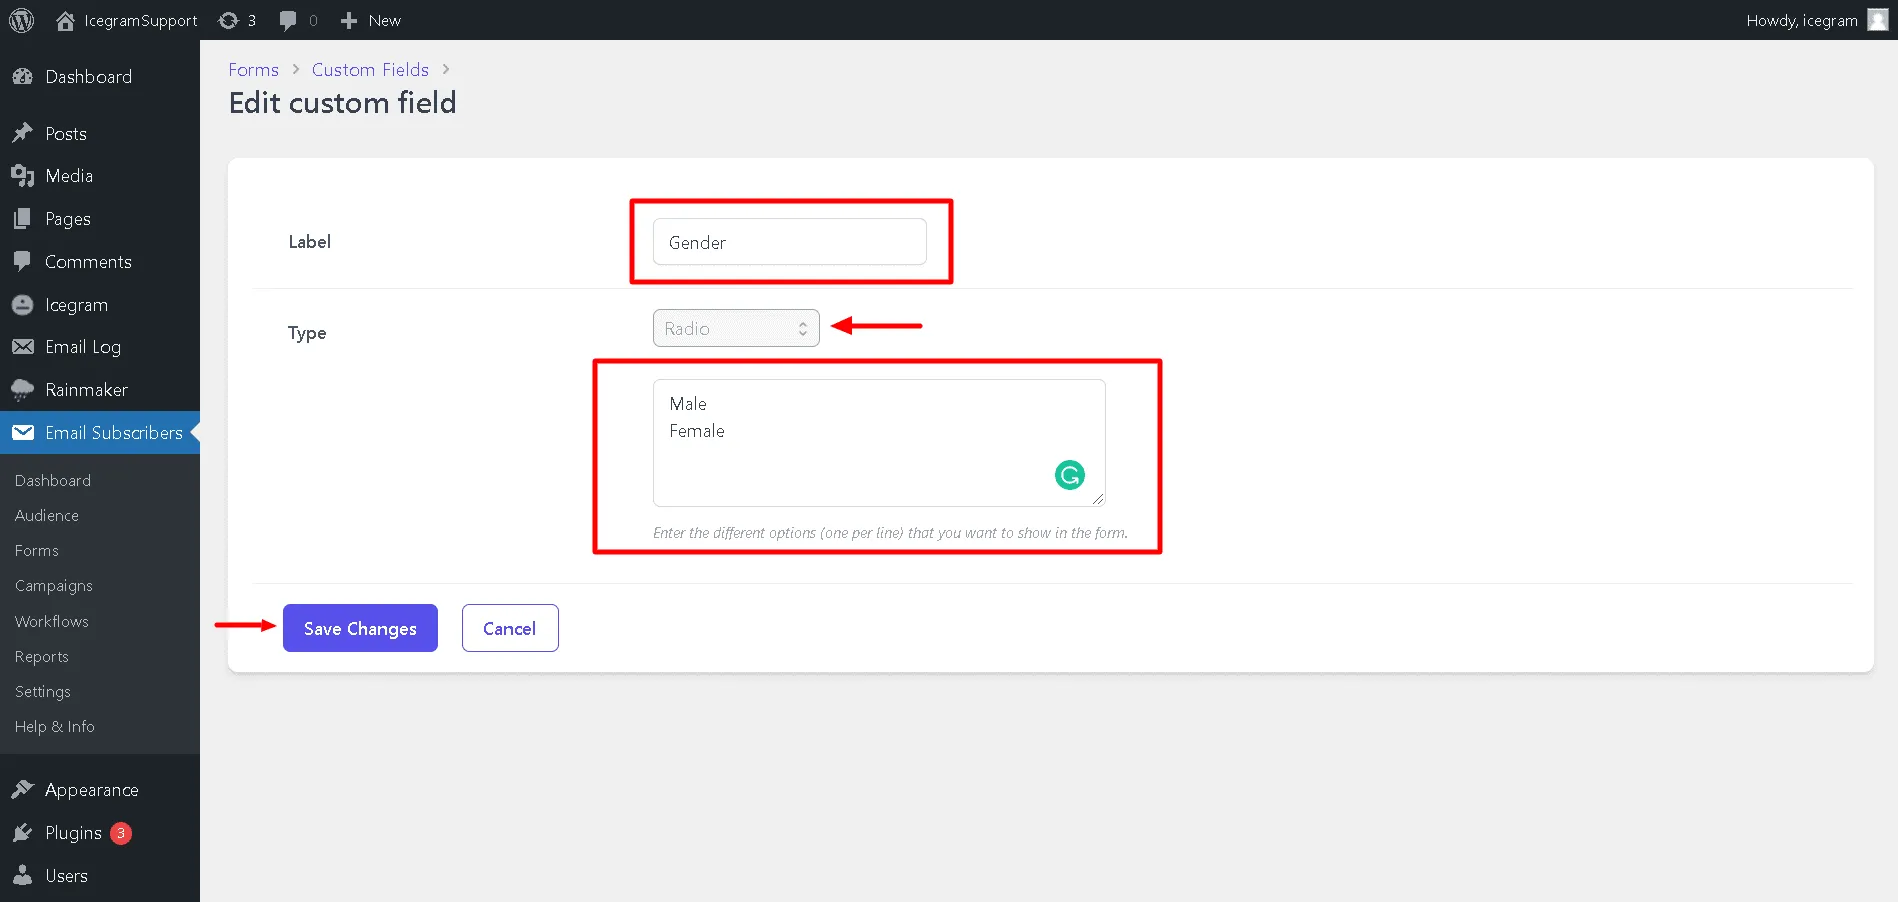
Configuring custom field options and field type -
Click Save Custom Field.
Adding Custom Fields to Your Subscription Forms
Once created, you can add custom fields to any opt-in form:
-
Navigate to
Icegram Express→Formsand edit an existing form (or create a new one). -
Under the form fields section, enable your newly created custom field and set its label and placeholder text.
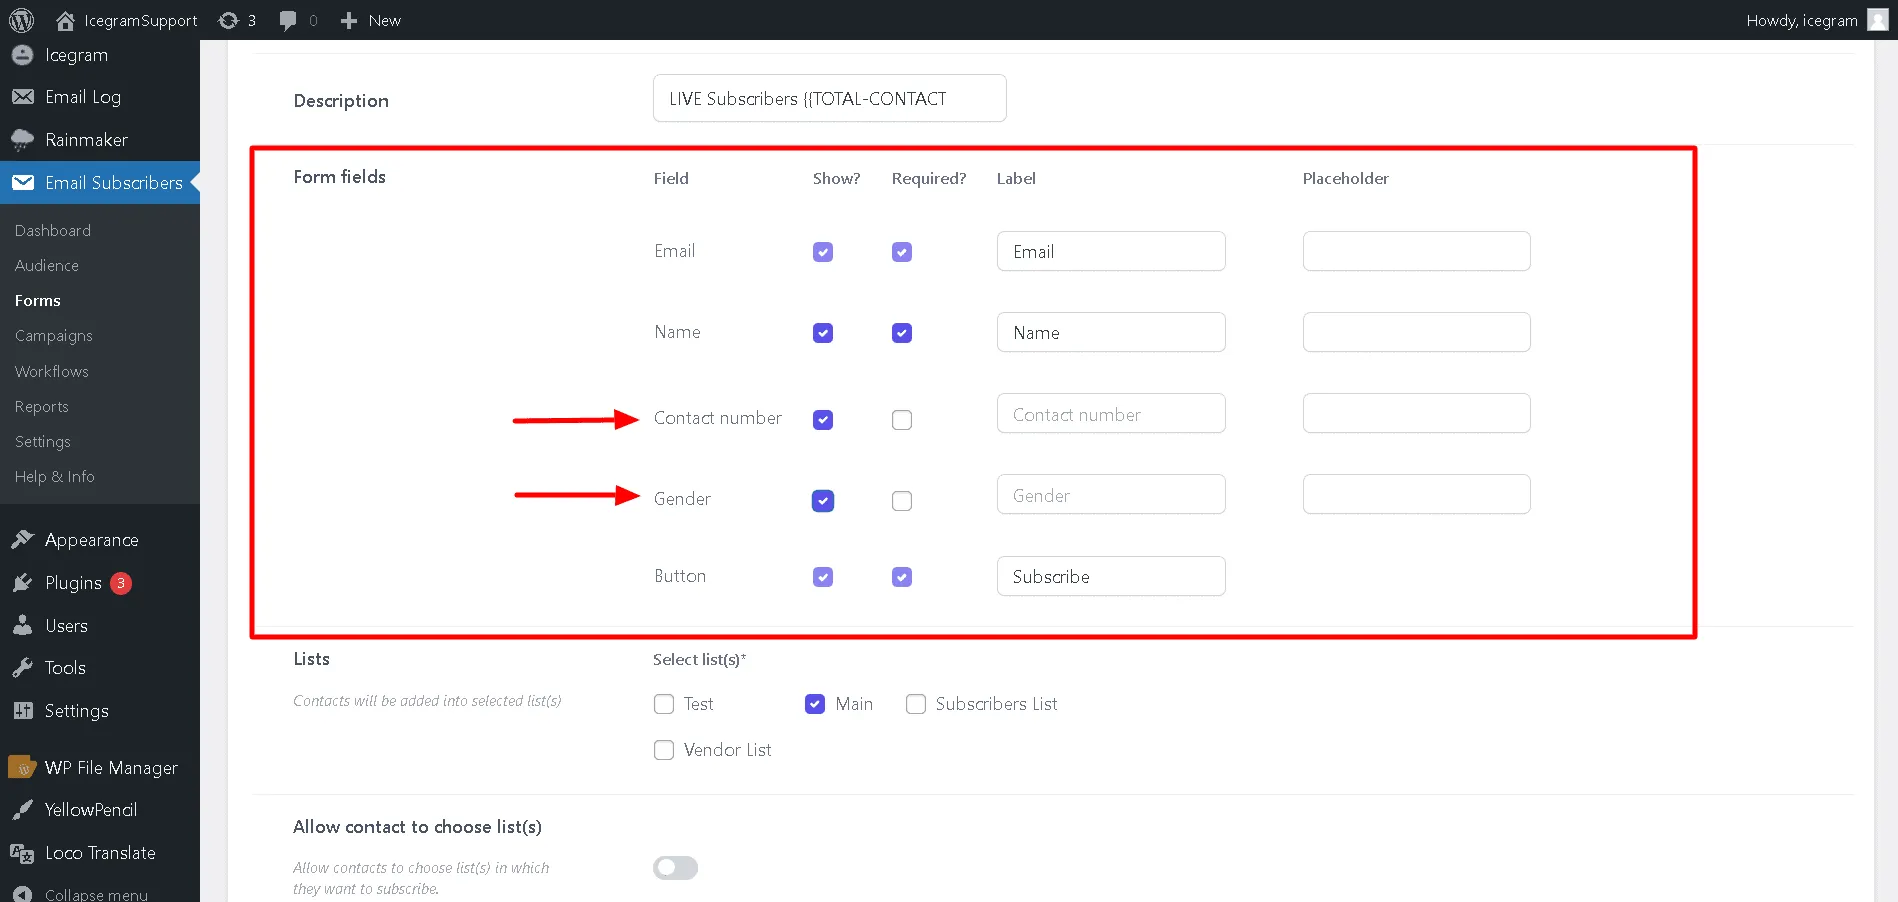
Adding the custom field to a subscription form -
Save the form and embed it on your site.
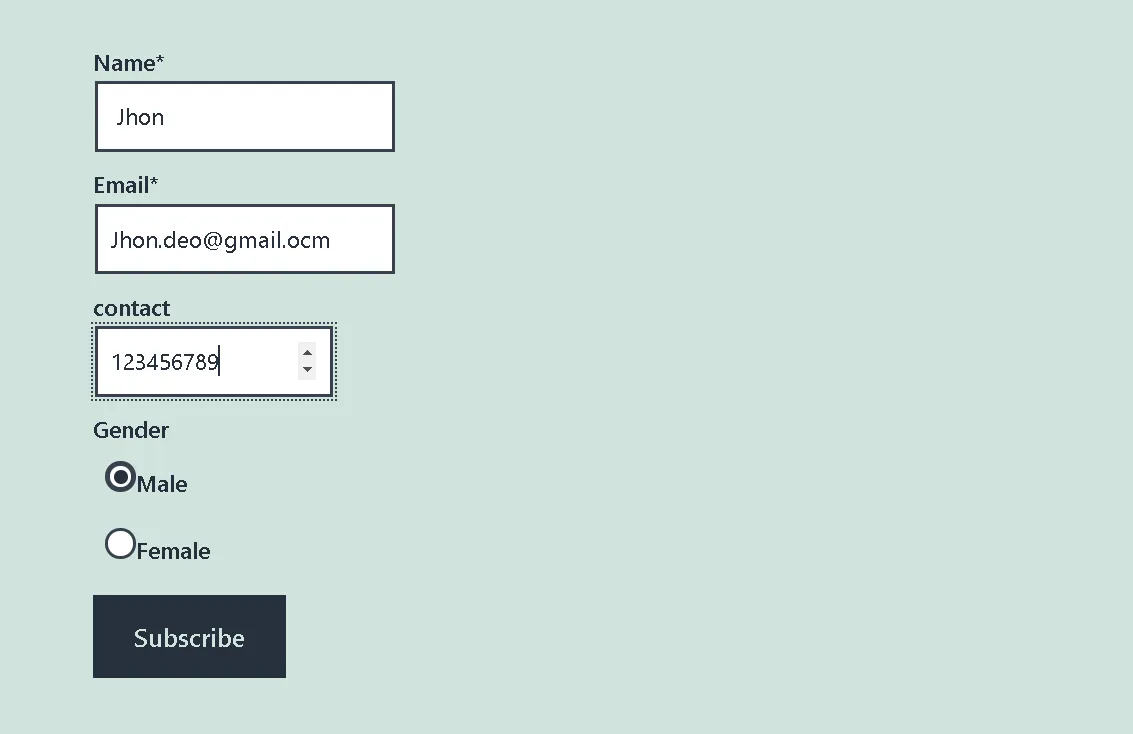
Subscription form with custom fields embedded on page -
When visitors submit the form, their custom field entries are automatically stored in their contact profile under
Icegram Express→Audience.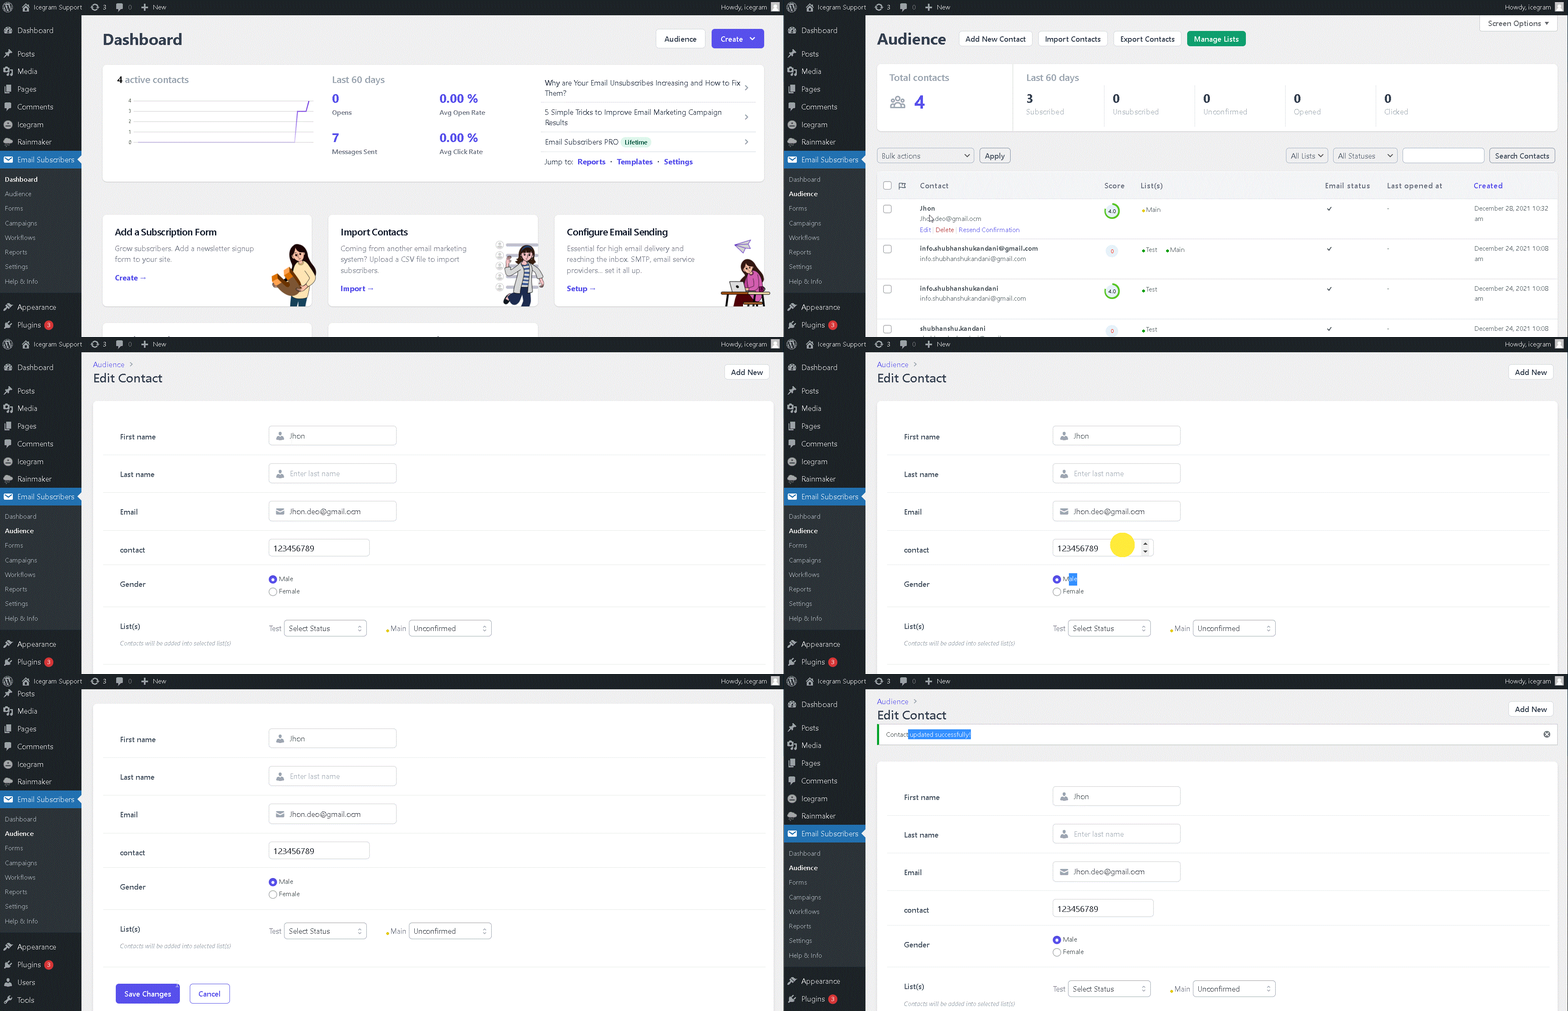
Viewing collected custom field data in audience profile