

How to Create a Subscription Form in Icegram Express
Design and customize newsletter subscription forms in Icegram Express with custom fields, lists, and anti-spam protection.
Icegram Express includes an intuitive form builder that lets you create customized opt-in forms to collect leads, assign subscribers to specific lists, and safeguard submissions against spam.
Steps to Create a Form
-
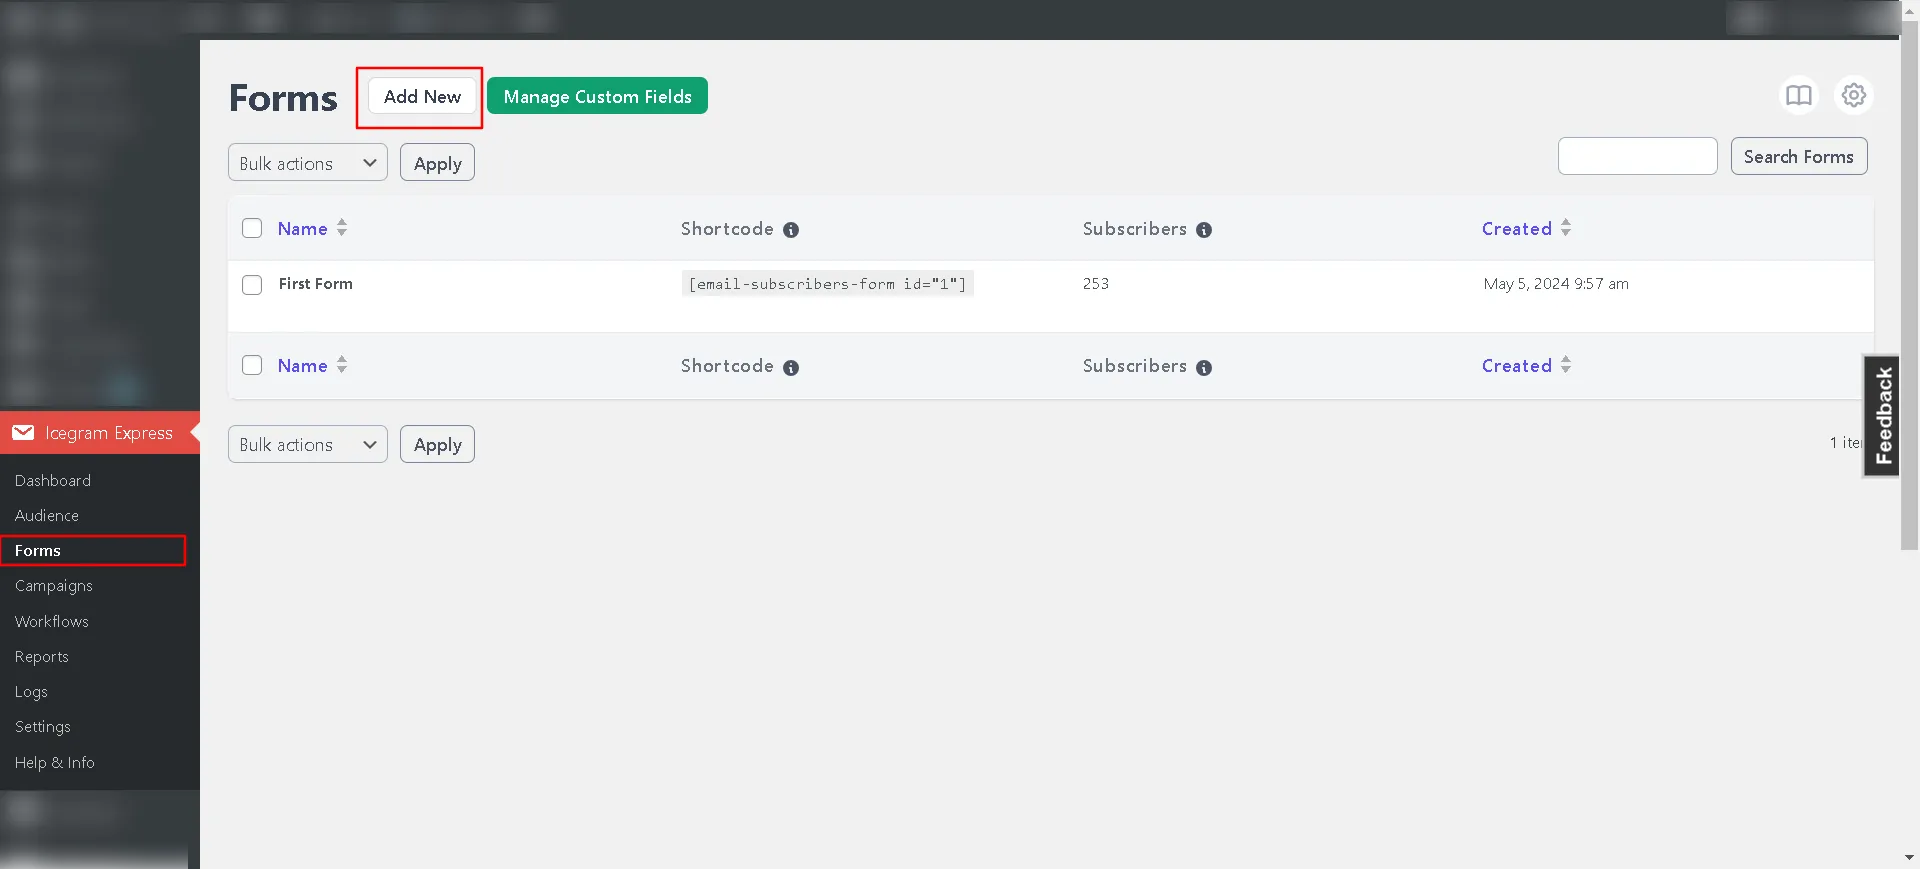
In your WordPress admin, navigate to Icegram Express > Forms and click Add New.
-
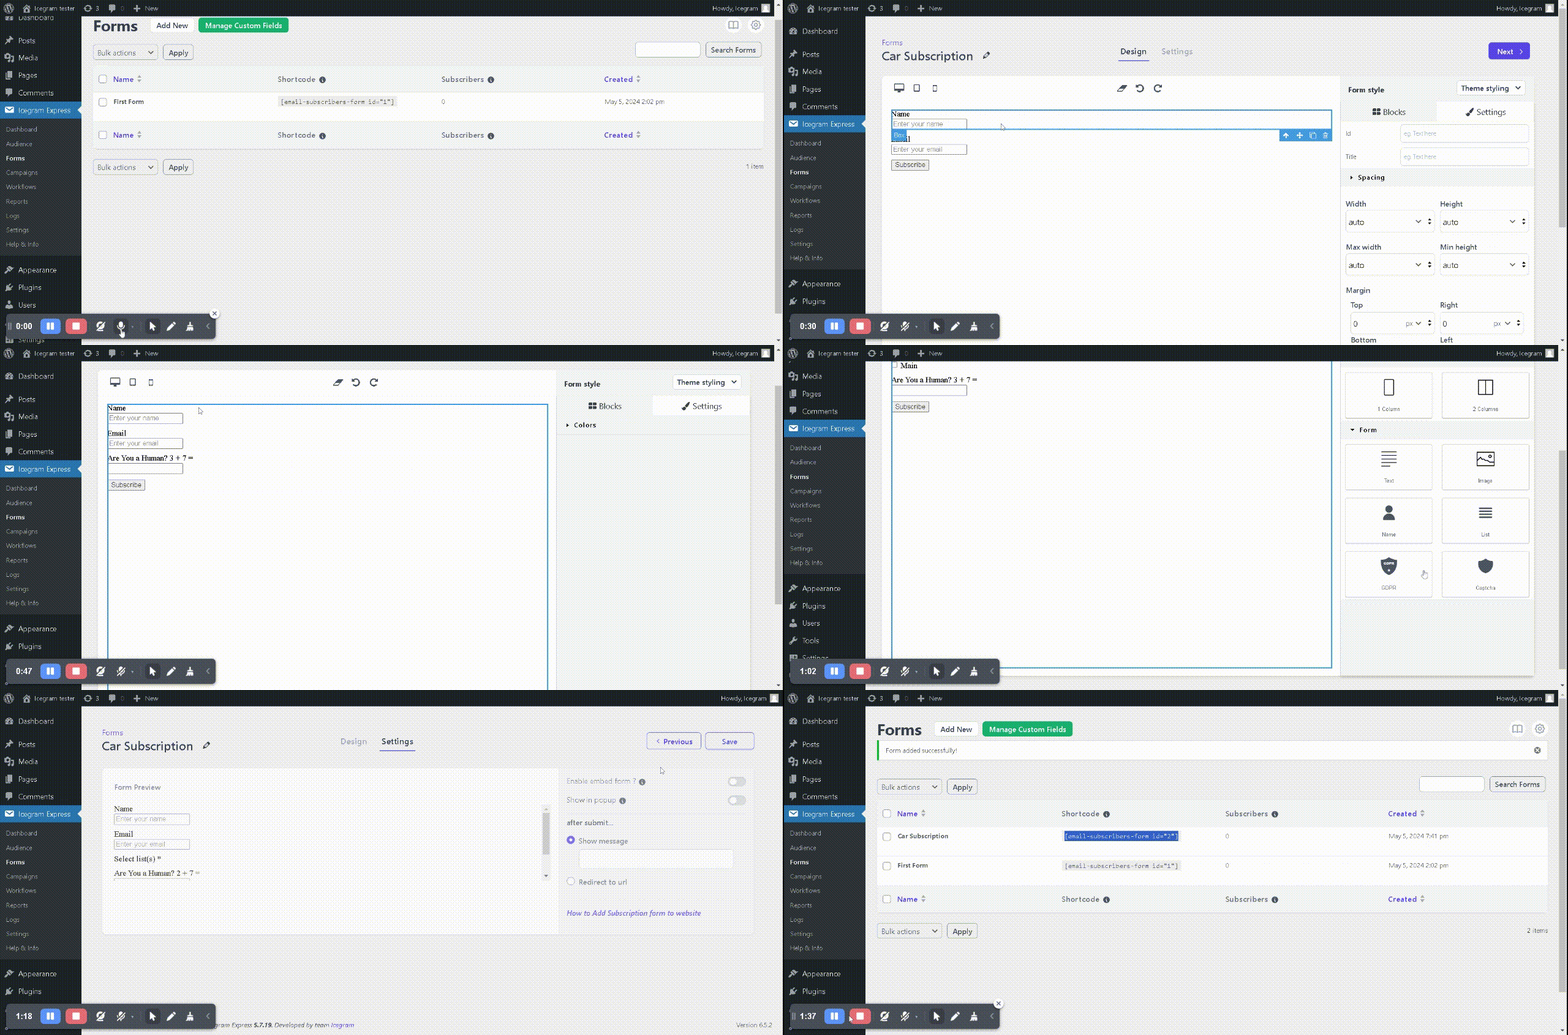
Use the visual builder to add and arrange the fields you want to collect.
-
Configure your core form properties:
- Form Name: An internal reference name for your dashboard.
- Description: Headline or introductory text shown above the form (e.g., “Join 15,000+ subscribers for weekly growth tips”).
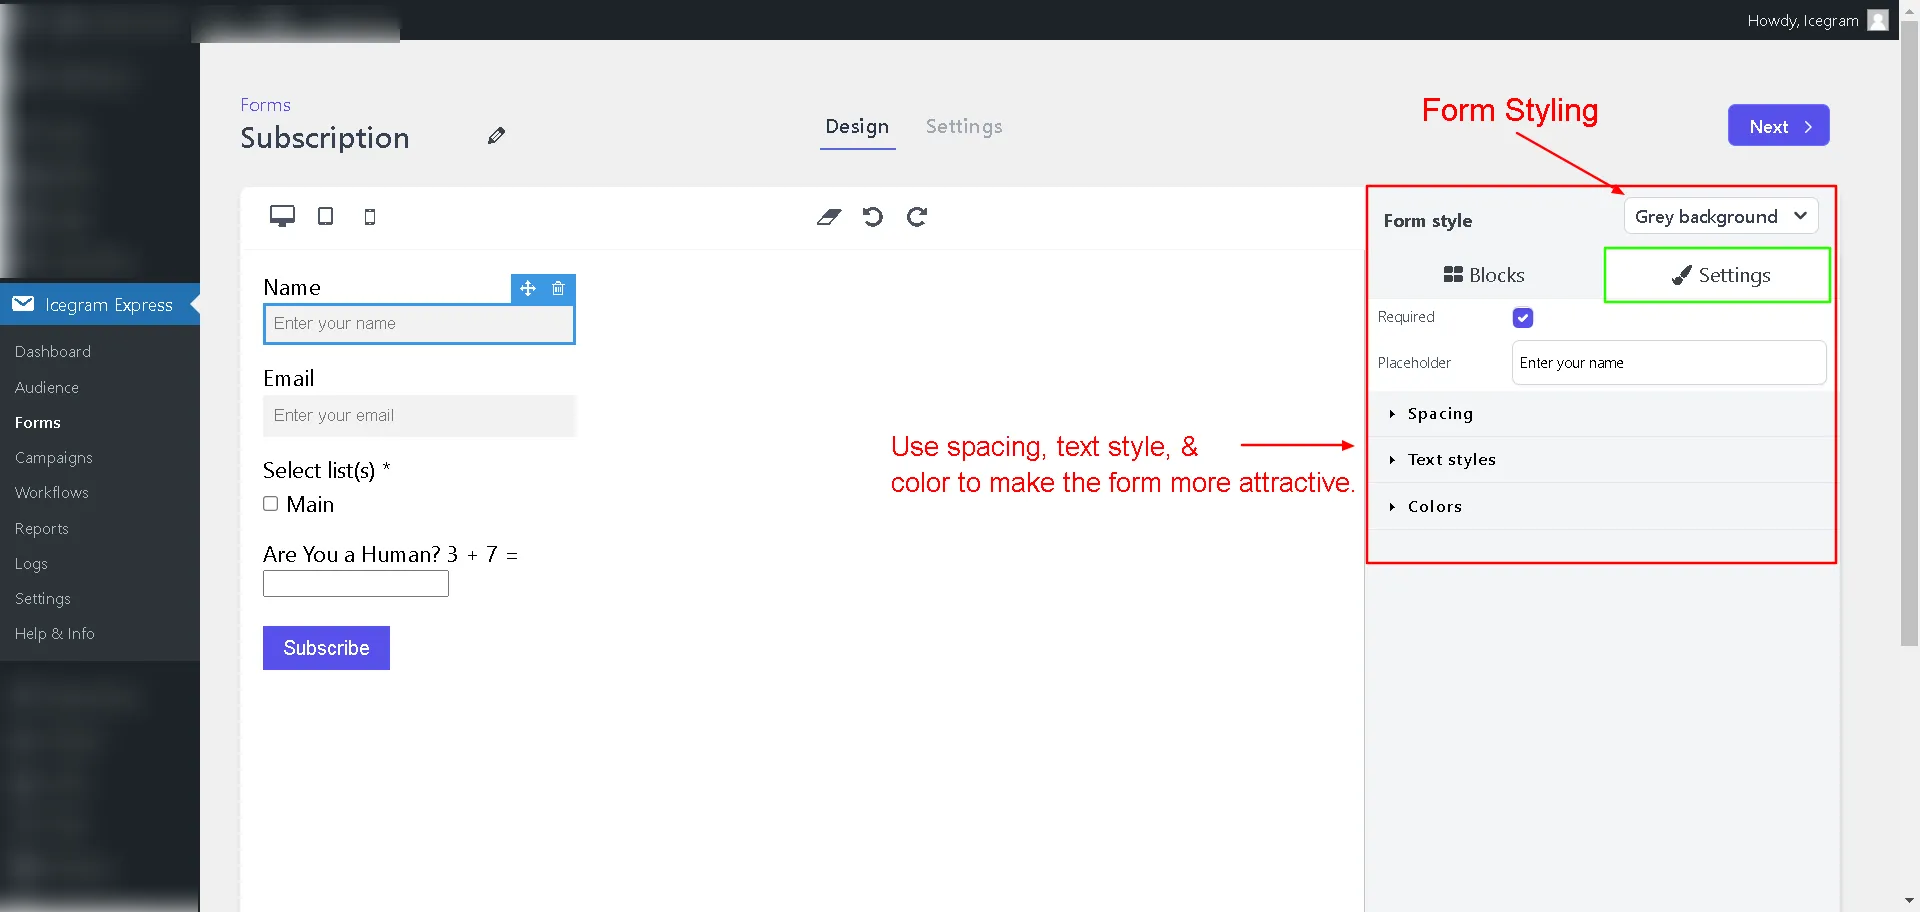
- Form Fields: Customize the Email and Name fields. Mark fields as required or optional, and adjust input placeholder text. Customize your submit button text (e.g., “Get Free Guide” or “Subscribe Now”).
-
Target Lists: Select which subscriber list(s) new contacts should be assigned to upon submitting this form.
-
Captcha Protection Starter: Enable built-in captcha or Cloudflare Turnstile / reCAPTCHA to prevent spam bots from submitting fake emails.
-
GDPR Consent Checkbox: Enable a mandatory consent checkbox with custom privacy policy links to ensure compliance.
-
Click Save Changes.
Once created, you can embed the form on your website or display it inside a popup.