How to Create a Form in the Icegram Collect
Icegram Collect allows you to create a form in two ways:
Subscription Form - Icegram Collect Readymade form wherein the default form elements will be Name, Email and a Submit button.
Custom Form - Your own custom HTML form.
1. To create a Subscription form using Icegram Collect, follow these steps:
Step 1: Install and Activate Icegram Collect plugin.
Step 2: From the WordPress Admin Menu, go to Icegram Collect, Forms. You'll find a form named "My First Form". This form is automatically created for you as an example after you activate the plugin.
Step 3: Hover over the form name, click "Edit".

Step 4: If you want to show the Name field in your form, tick the checkbox besides Name under the "Show?" column.
Step 5: Change the label of all the fields according to your requirements. You can obviously keep the default ones as well.

Step 6: Navigate to the "Design" tab.
Step 7: Choose between Classic, Iconic and Material Design. These designs represent the exact look of the form on the frontend of your site.

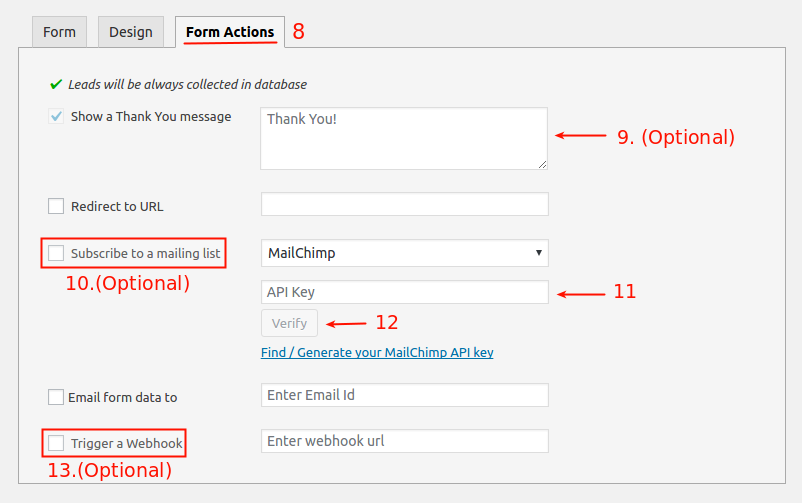
Step 8: Go to "Form Actions" Tab.
Step 9: Add a Thank You message which will be shown when someone submits the form. The default is "Thank You!"
Step 10: All the form submits through the Icegram Collect plugin are collected and stored in the database. If you wish to forward it to your Mailing List provider, check the box that says ""Subscribe to a mailing list"", and from the adjoining dropdown, select your mailing list provider. Currently, only Mailchimp is supported but more will come soon.
Step 11: Enter your Mailchimp account API Key and click Verify. (the link where you would find your API Key is given under the Verify button).
Step 12: Once you verify your account, select the list to which you want to forward the leads data.
Step 13: If you wish to trigger a webhook on form submit, you can check the box that says "Trigger a Webhook" and enter the URL which you want to trigger. More info regarding Webhook Integration is here.
Step 14: Click on "Update". With this, your form is ready to show on the frontend and to collect leads!
2. To create a Custom form using Icegram Collect, follow these steps:
Step 1: Install and Activate Icegram Collect plugin.
Step 2: From the WordPress Admin Menu, go to Icegram Collect , Forms. You'll find a form named "My First Form". This form is automatically created for you as an example after you activate the plugin.
Step 3: Hover over the form name, click "Edit".
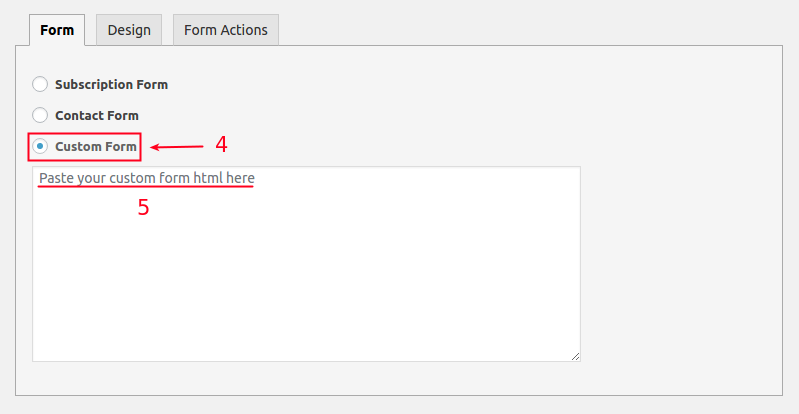
Step 4: In the "Form" tab, click on the Radio button that says "Custom Form".
Step 5: Add all your custom form HTML in the textbox.
Step 6: Follow steps 6 to 14 from the above section to create subscription forms.