Getting Started with Icegram Genie
Turn ideas into ready to send email campaigns in minutes. Icegram Genie works alongside Icegram Express and helps you create email campaigns using natural language prompts. Simply describe the campaign you want, and Genie generates the subject line, email content, and campaign structure for you.
Whether you're sending newsletters, welcome emails, product announcements, or re-engagement campaigns, Genie helps you go from idea to draft without starting from a blank page.
Before You Begin
Make sure you have:
- WordPress installed
- Icegram Express installed and activated
- Icegram Genie installed and activated
- An active Claude account
Once these requirements are ready, you can connect Claude to your WordPress site and start generating campaigns.
How Icegram Genie Works
Icegram Genie connects Claude with your WordPress site using MCP (Model Context Protocol).
This allows Claude to:
- Create email campaigns
- Generate subject lines and content
- Create campaign drafts inside Icegram Express
- Manage subscribers and lists
- Access email marketing tools directly from your WordPress site
- And more
Everything stays within your WordPress environment.
Configure MCP Integration
Connect Icegram Genie with Claude and start creating campaigns directly from your WordPress site. Once connected, Claude can securely interact with Icegram Express through MCP (Model Context Protocol). This allows you to create campaigns, manage subscribers, and perform email marketing tasks using simple prompts.
Step 1 - Set Up OAuth Server and Credentials
Before Claude can connect to your WordPress site, you'll need to create secure access credentials.
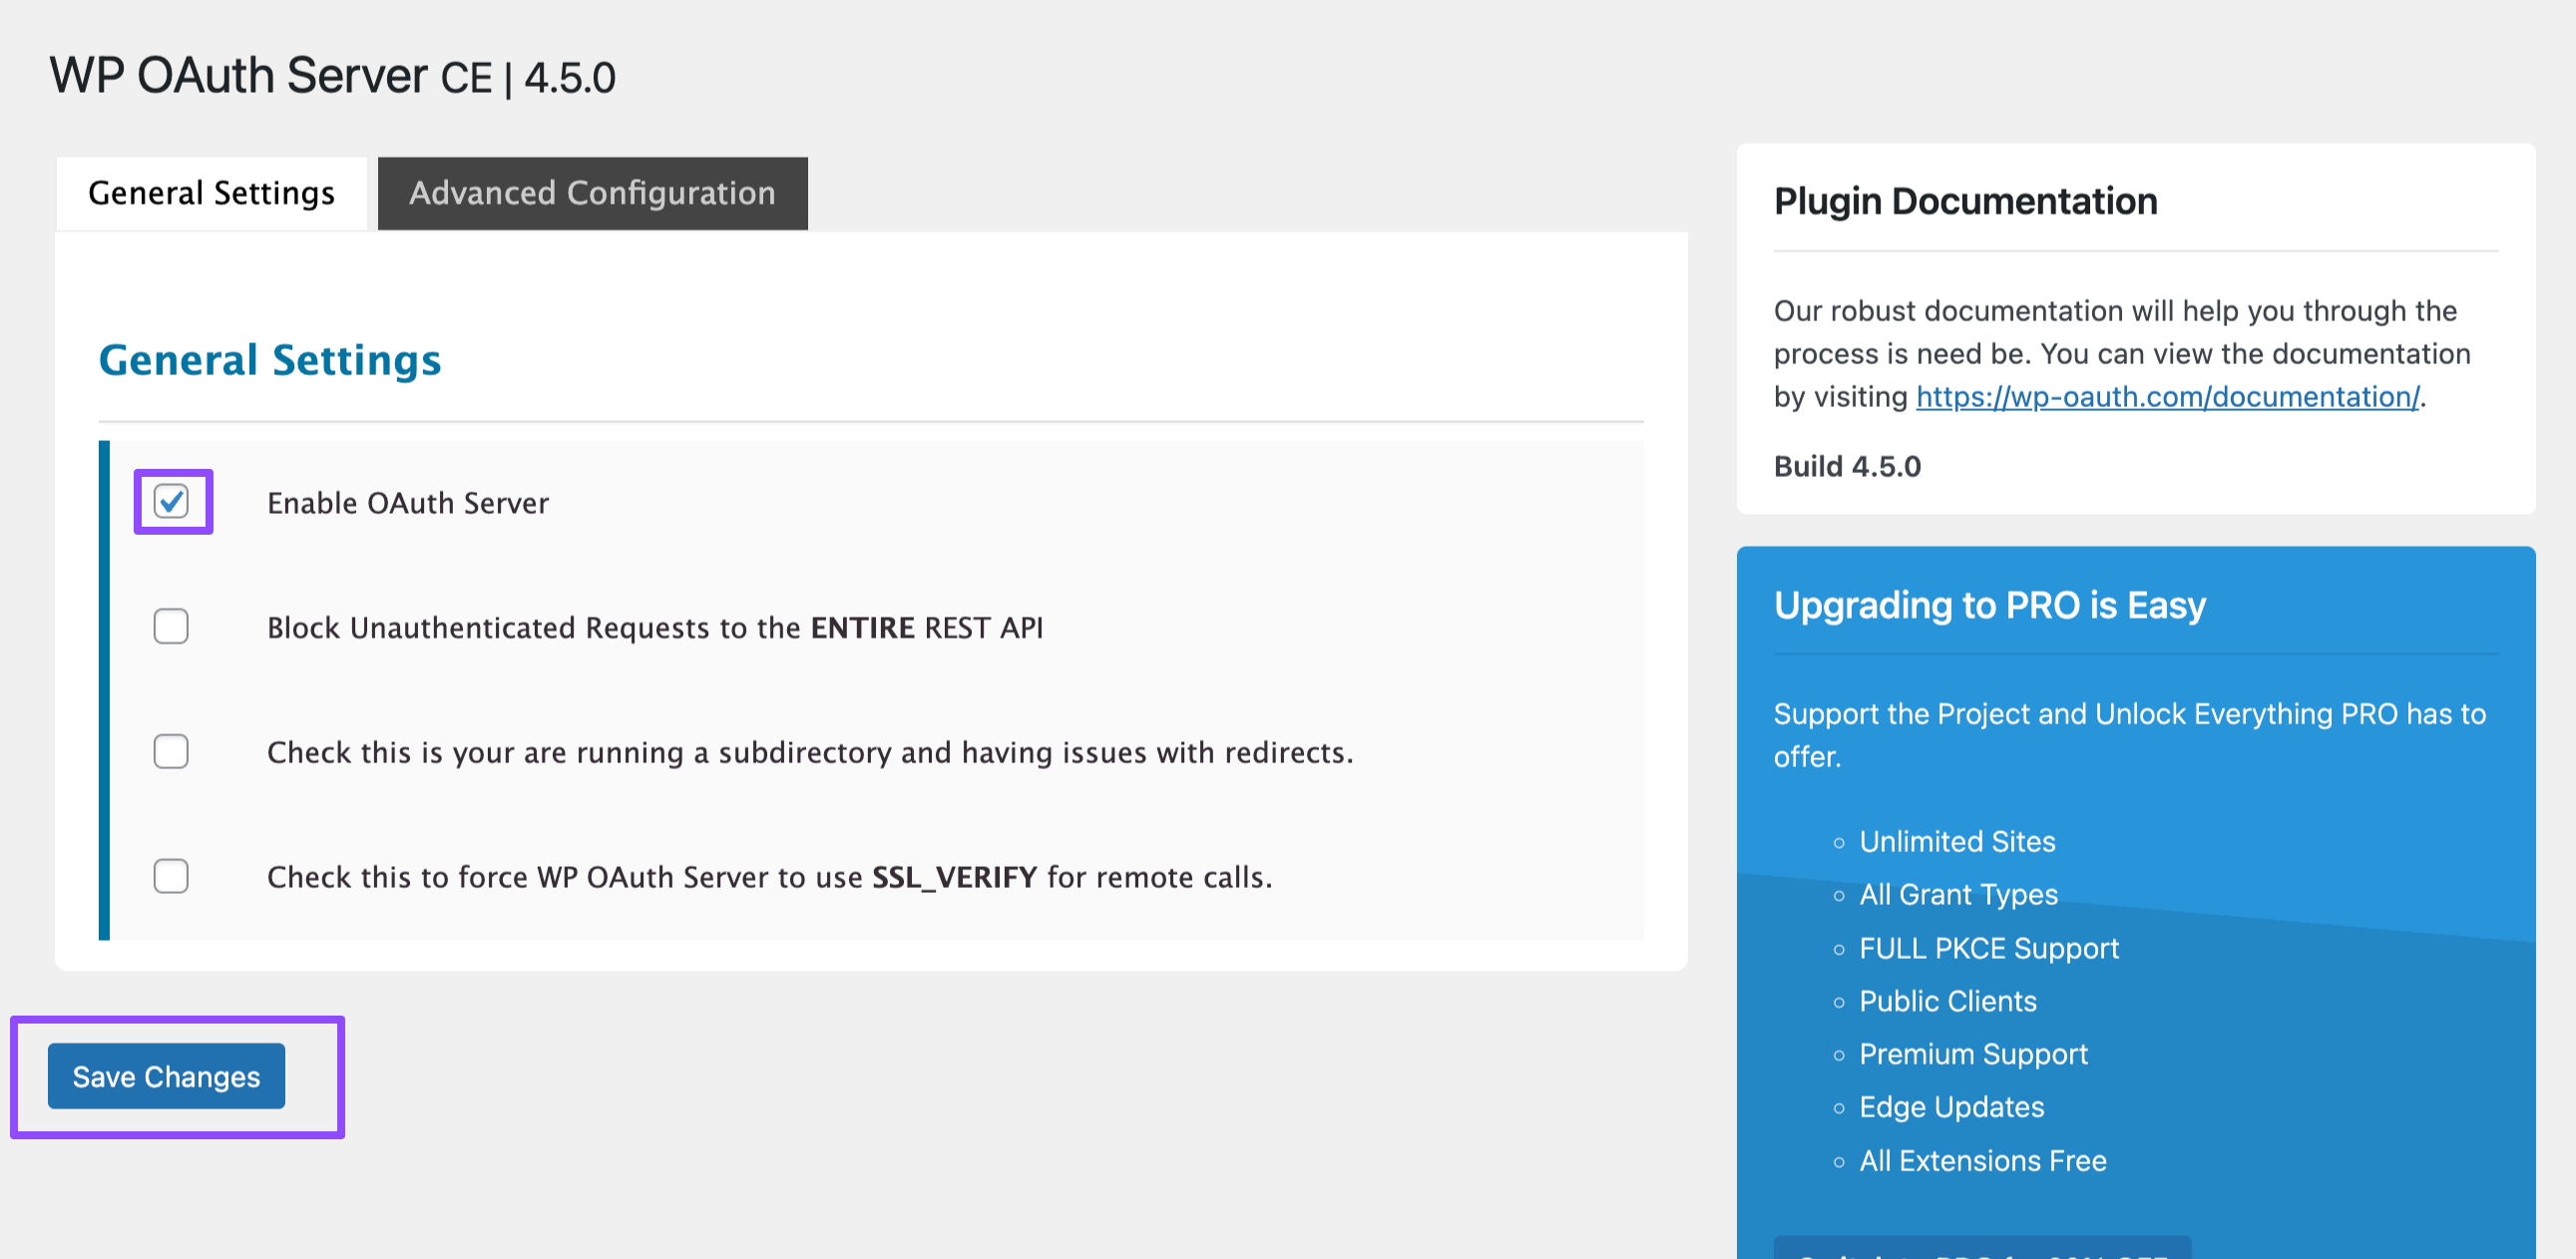
Enable OAuth Server
Navigate to Dashboard → OAuth Server → Settings.
Check Enable OAuth Server.
Click Save Changes.
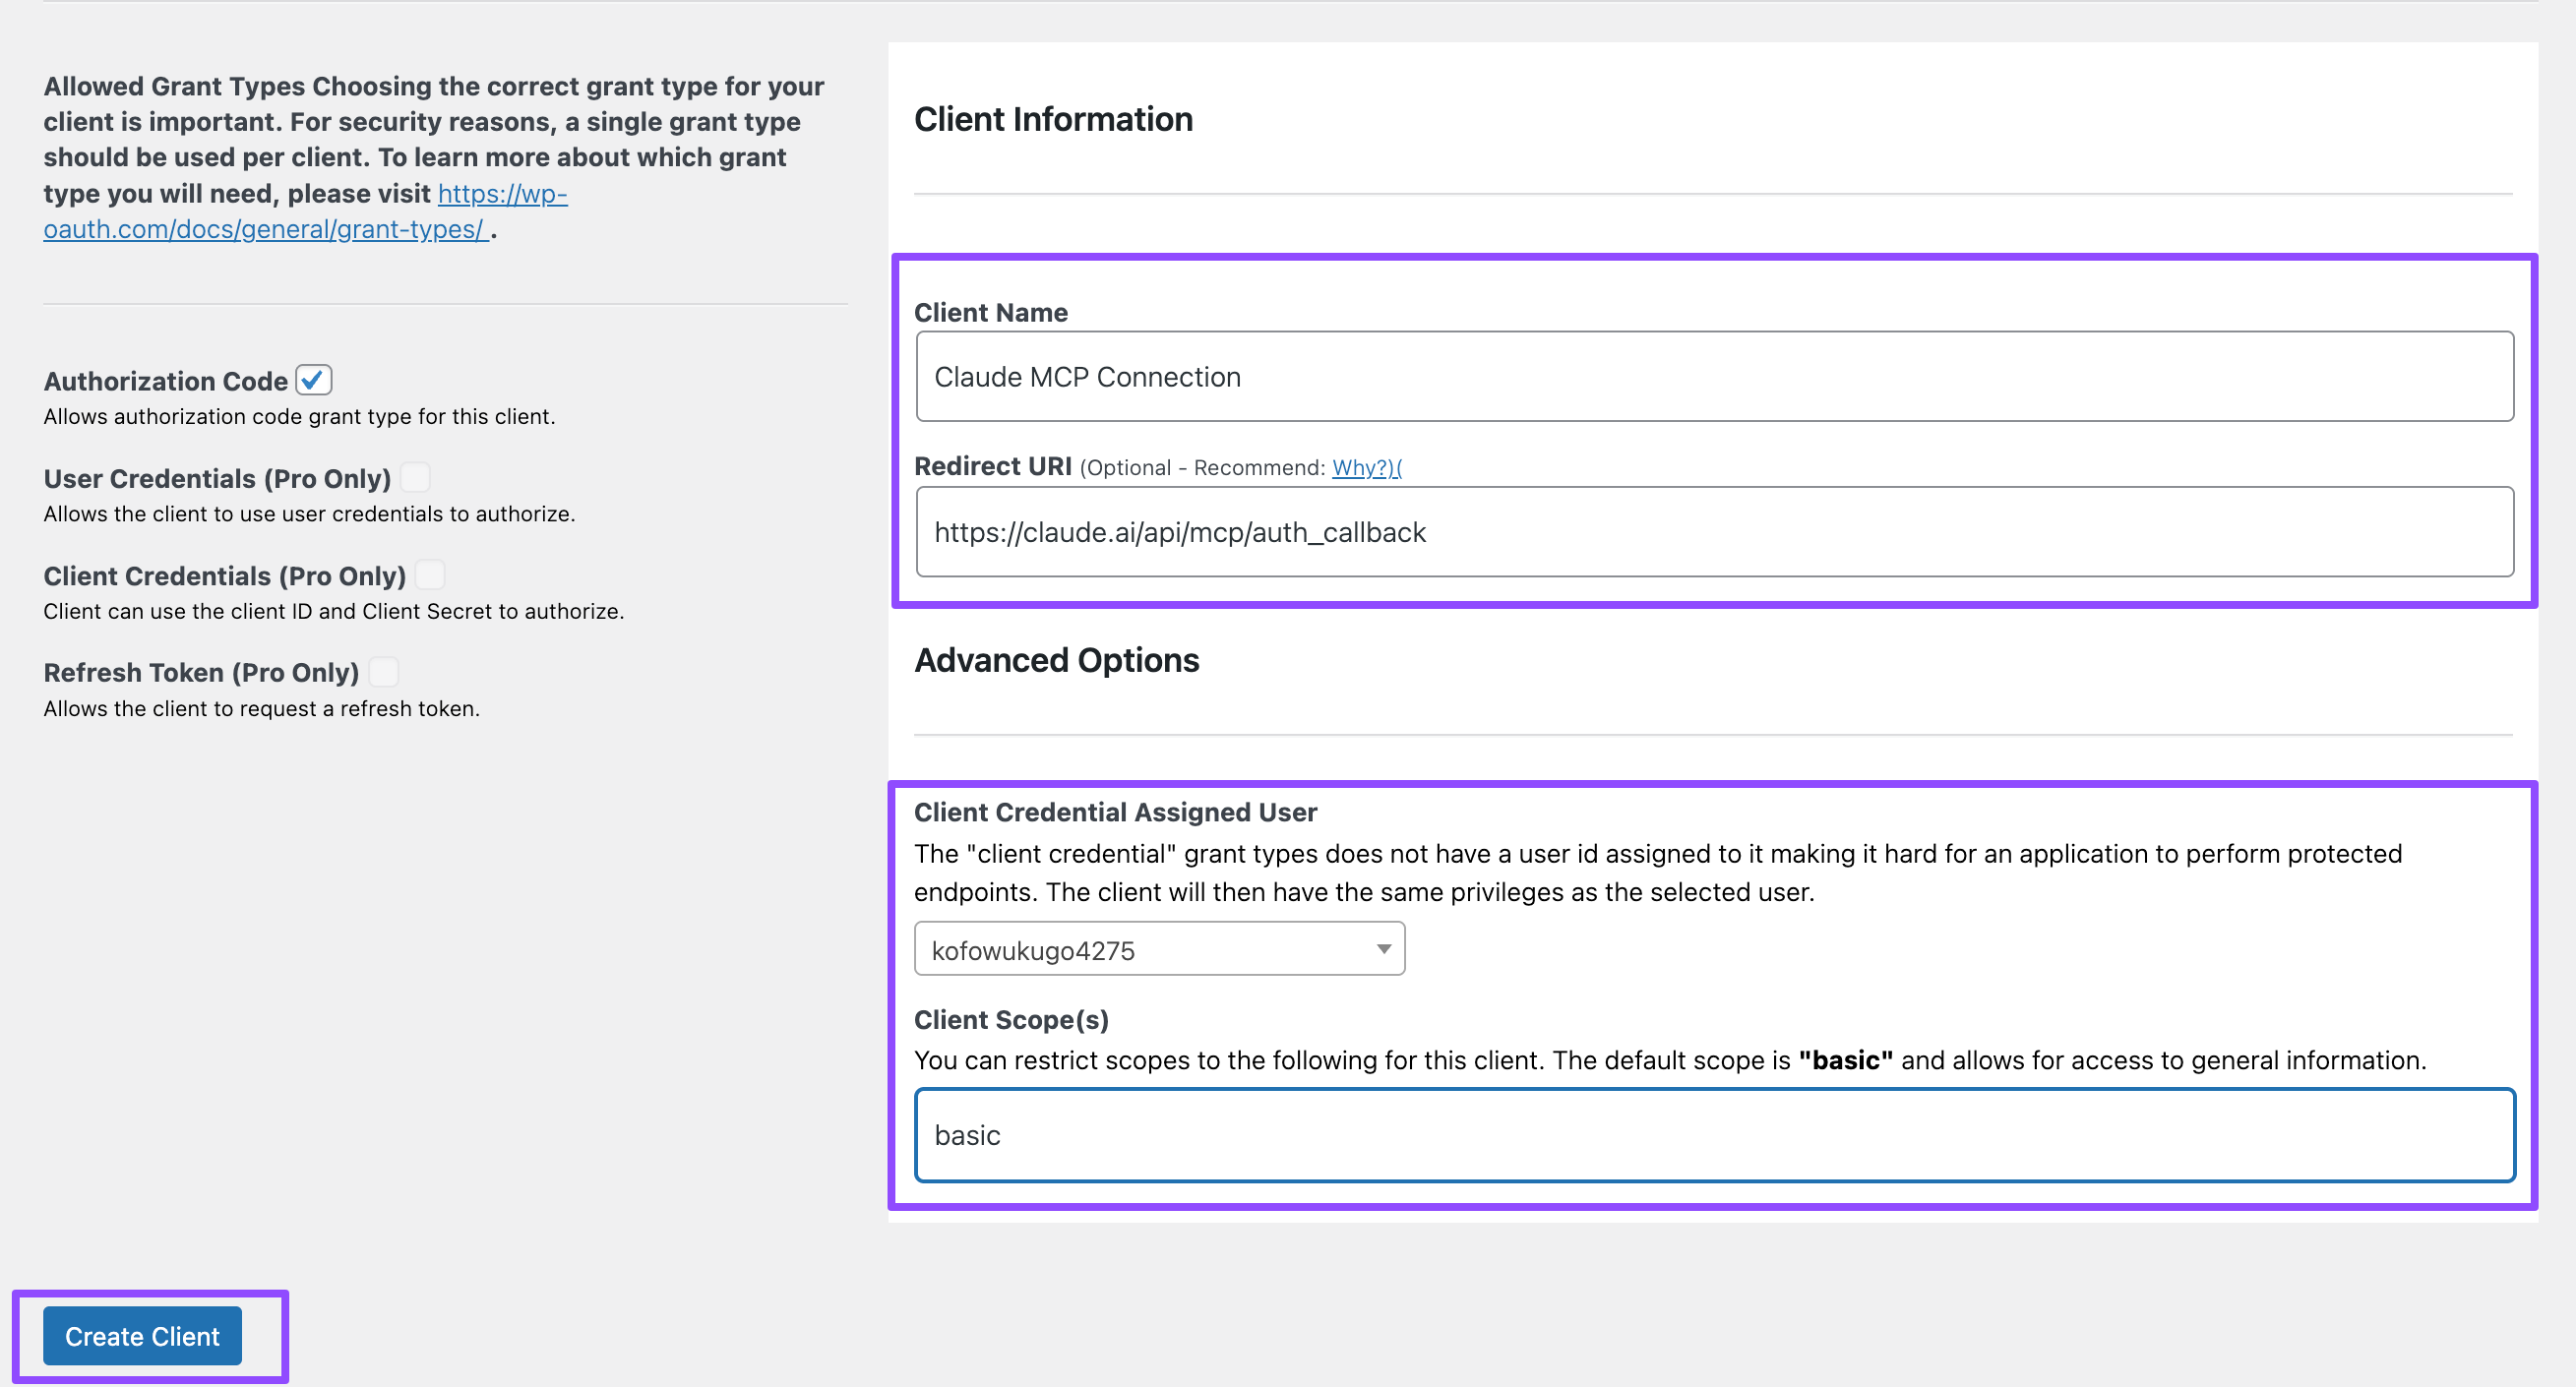
Create a New Client
Go to OAuth Server → Clients.
Click Add New Client.
Enter a client name, such as:
Claude MCP ConnectionIn the Redirect URI field, enter:
https://claude.ai/api/mcp/auth_callbackUnder Client Credential Assigned User, select your administrator account.
Set Client Scope(s) to:
basicClick Create Client
Save Your Credentials
After creating the client, you'll receive:
- Client ID
- Client Secret
Keep these details handy. You'll need them in the next step when connecting Claude.

Step 2 - Connect Claude to Your WordPress Site
Now it's time to connect Claude with your Icegram Genie installation.
Open Claude
Visit Claude.ai.
Sign in to your account, or create one if you don't already have it.
Navigate to
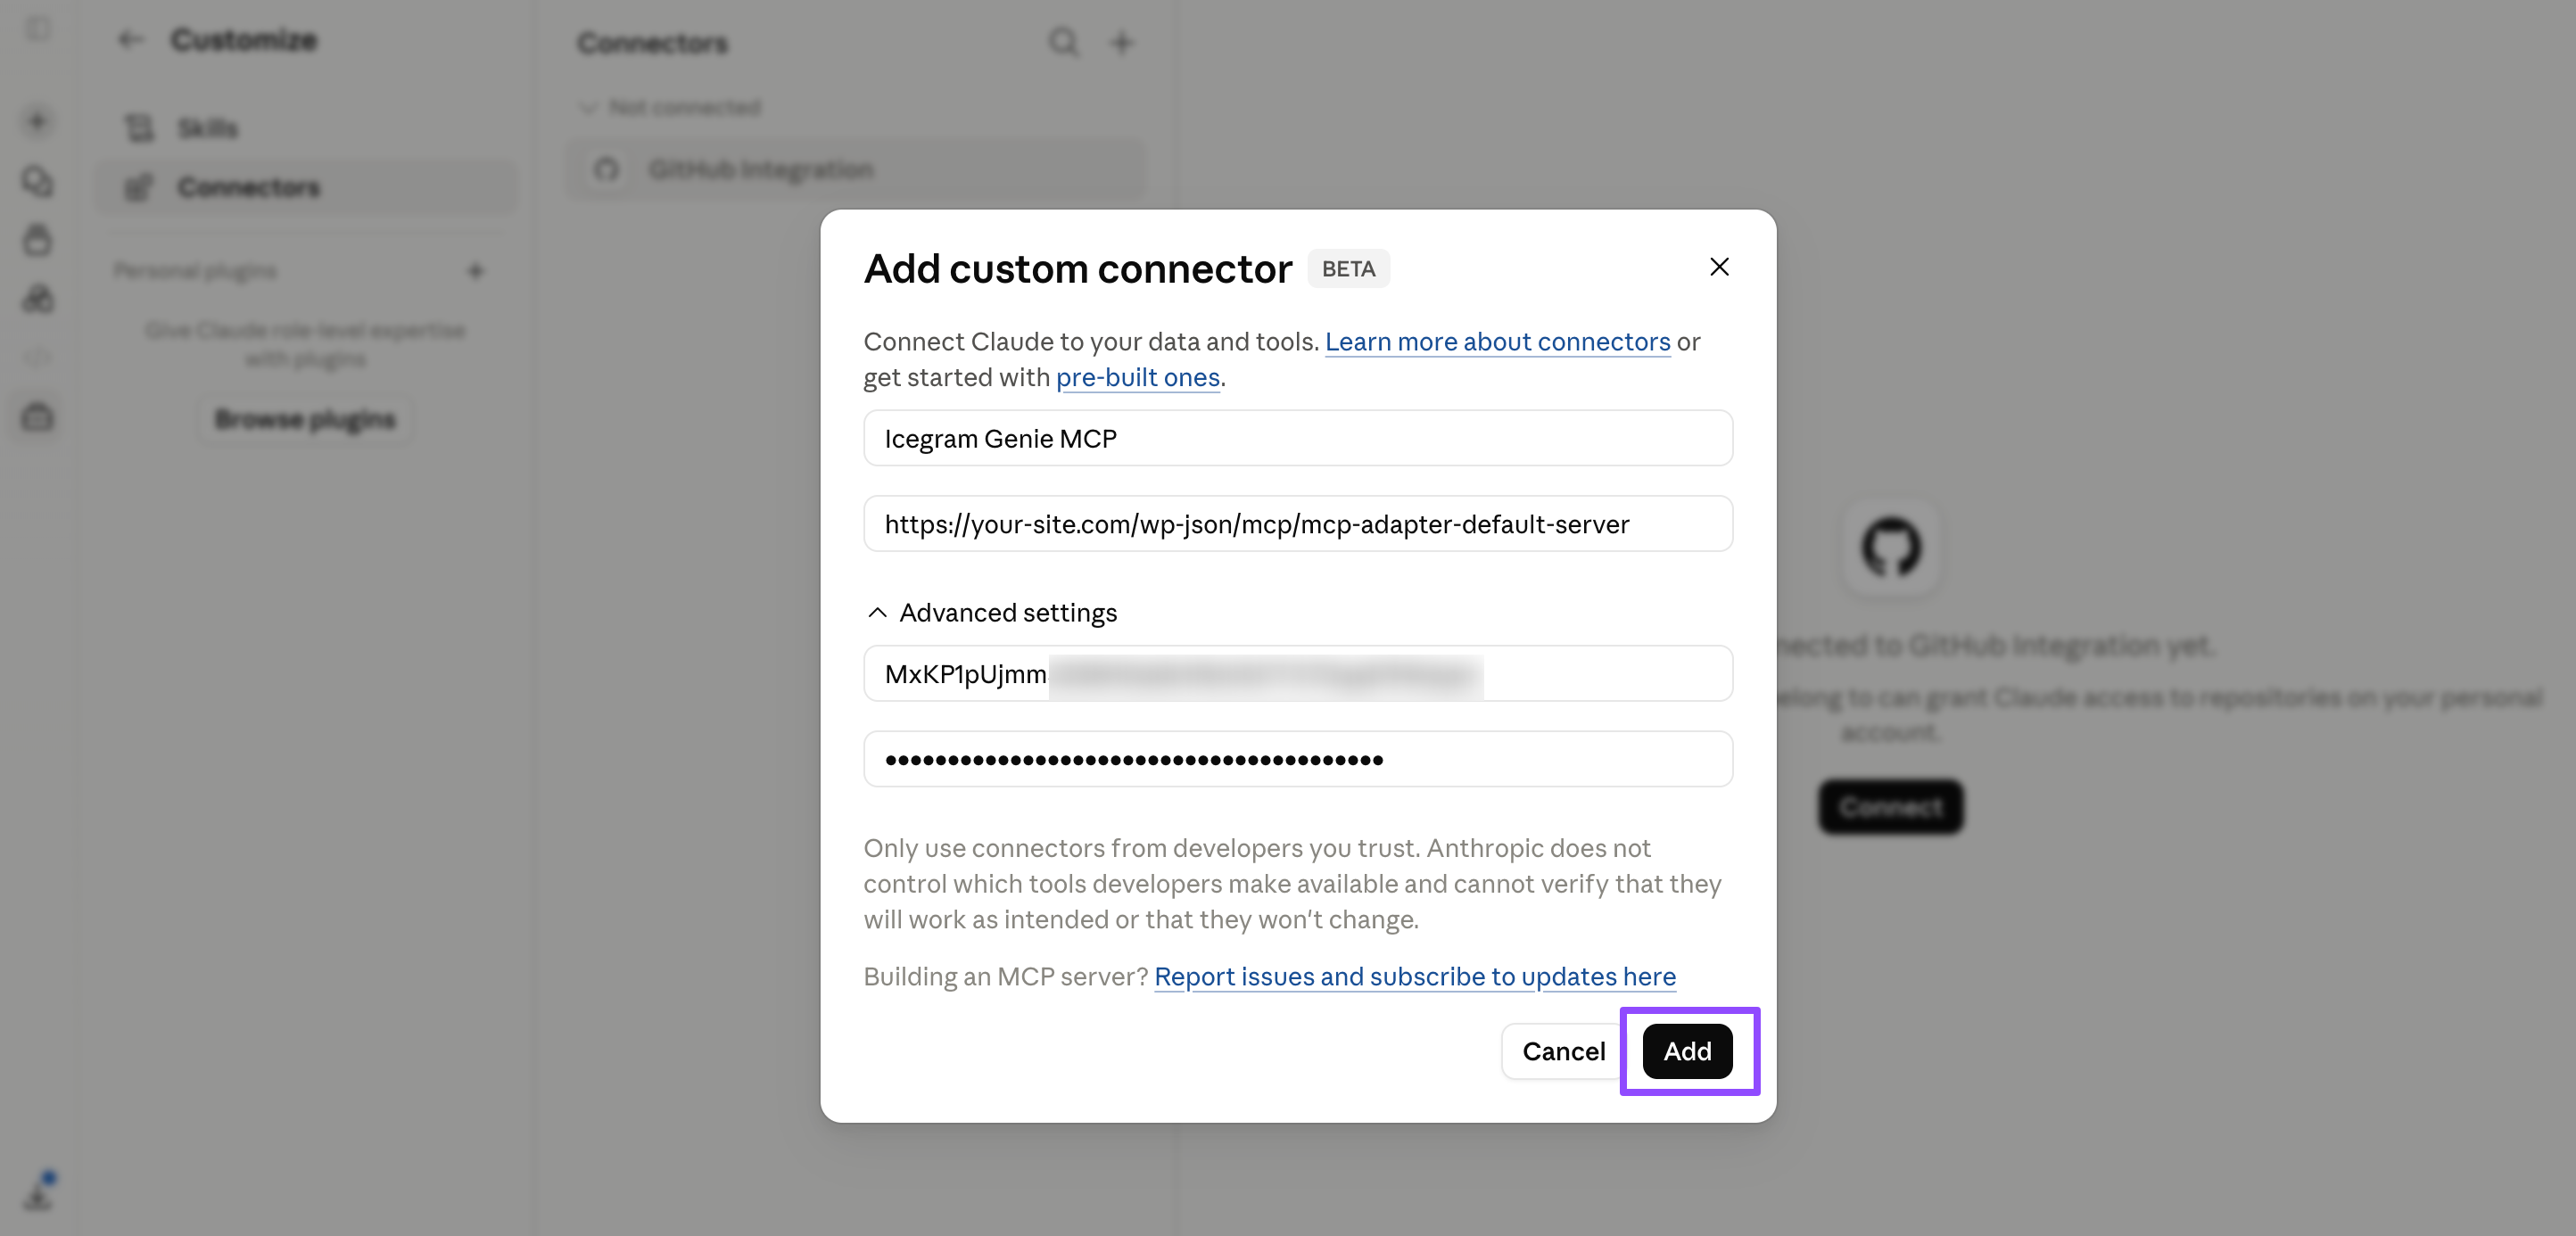
Add a Custom Connector→ Open Settings → Connectors then Click Add Custom Connector.

- Fill in the following information: Enter Connector Details
Example:
Connector Name
Icegram Genie MCPMCP Server URL Use your site's MCP server URL:
https://your-site.com/wp-json/mcp/mcp-adapter-default-serverAdd Your
OAuth Credentials→ Open Advanced Settings → Paste the Client ID & Client Secret from Step 1.To Complete the Connection → Click Add then Connect.
Follow the authorization screen and approve access.
Once authorization is complete, Claude will be connected to your WordPress site through Icegram Genie.
You're Ready!
That's it.
Claude can now communicate securely with Icegram Genie and Icegram Express.
Try a prompt like:
Show me the campaigns that performed best in the last 90 days and explain why
Or
What campaign topics consistently perform well with my audience?
Your campaign drafts will be created inside Icegram Express, ready for review and sending.
Need Help?
If you have any questions while setting up or using Icegram Genie, please contact our support team.