How to manage custom fields in Icegram Express?
Did you ever wish that you could gather personalized information such as the contact number, gender, age, etc? Do you want to add more fields to the subscription form? Considering this type of request related to adding the additional field, we came up with a custom field feature. A custom field allows you to collect additional information about your subscribers, such as their contact number, country name, or date of birth.
You can customize the Newsletter Subscription Form easily with the custom fields feature.
How to create a custom field in Icegram Express
Step 1: Navigate to Icegram Express > Forms > Manage Custom Fields.

Step 2: Click on Add New Button.

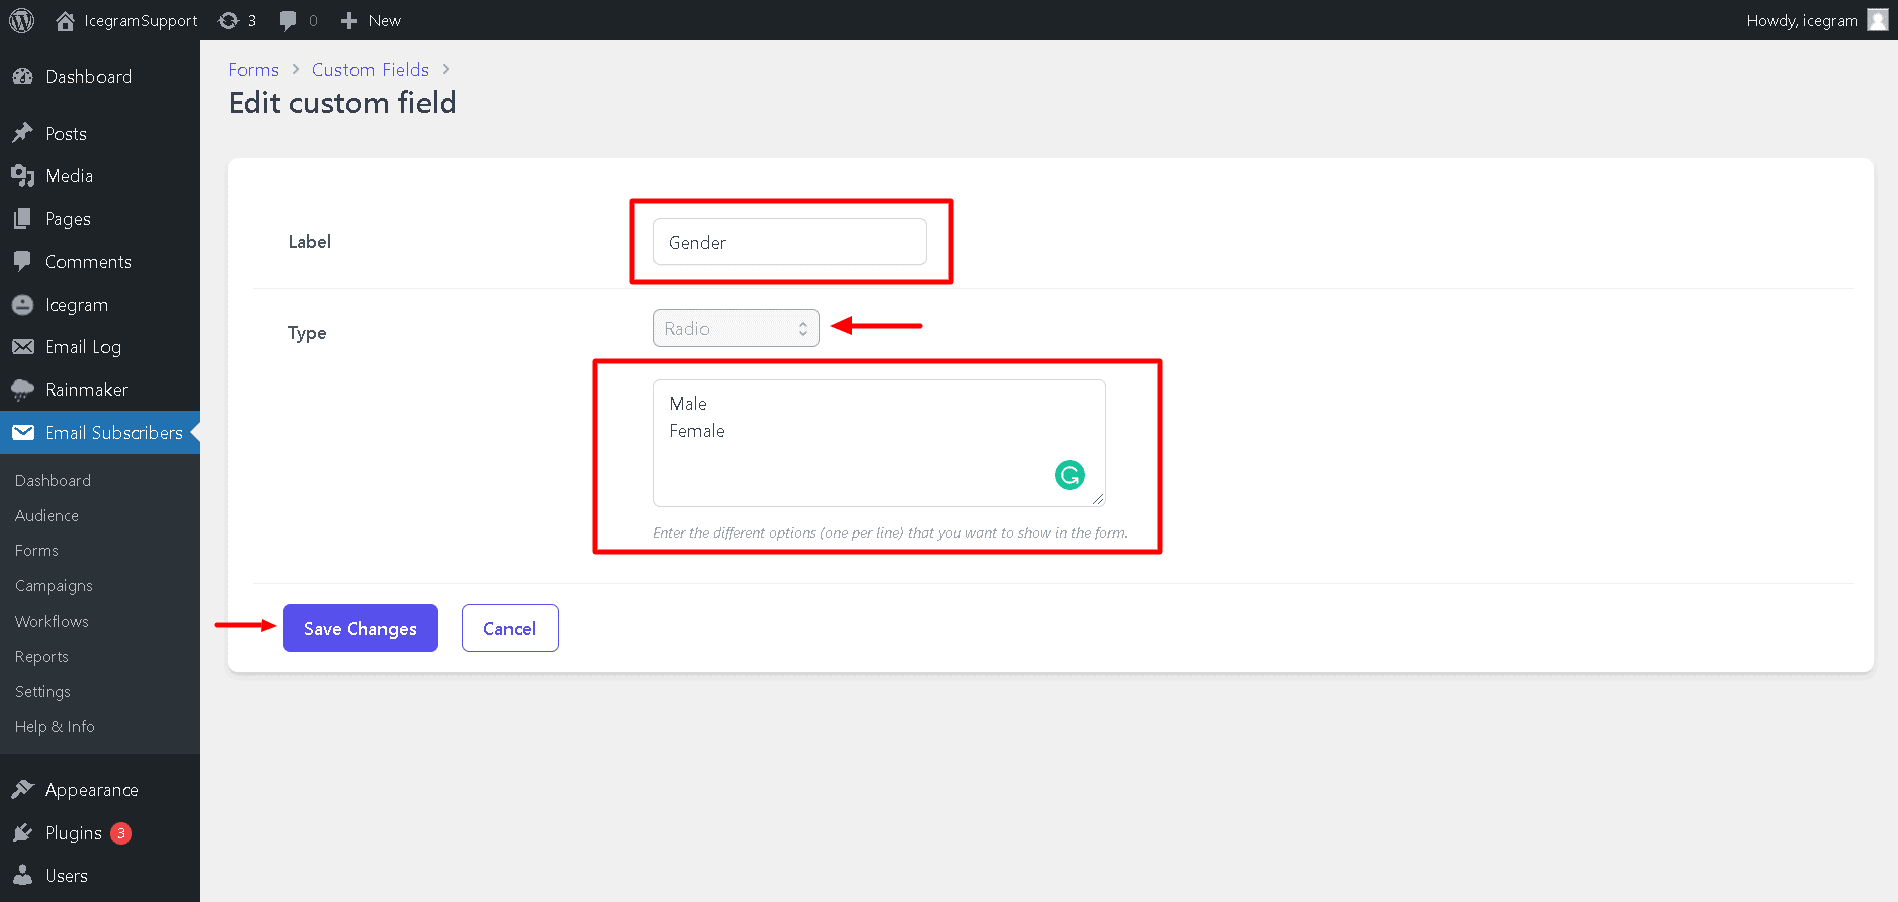
Step 3: Enter Label Name and Type, you can choose type as per your requirement in the new field. and Submit the Button Save Custom field.
For example, if you select type as the Radio button/Dropdown then you need to also enter the options in the box which you want to showcase in the radio button/Dropdown List. You can refer to the screenshot mentioned below.
Note: Enter the different options (one per line) that you want to show in the form.
Step 4: As soon as the new custom field is created, you can add it to the form. For this, please go to Icegram Express > Forms > Edit; there you will find a label box in which you can add the label for each field.
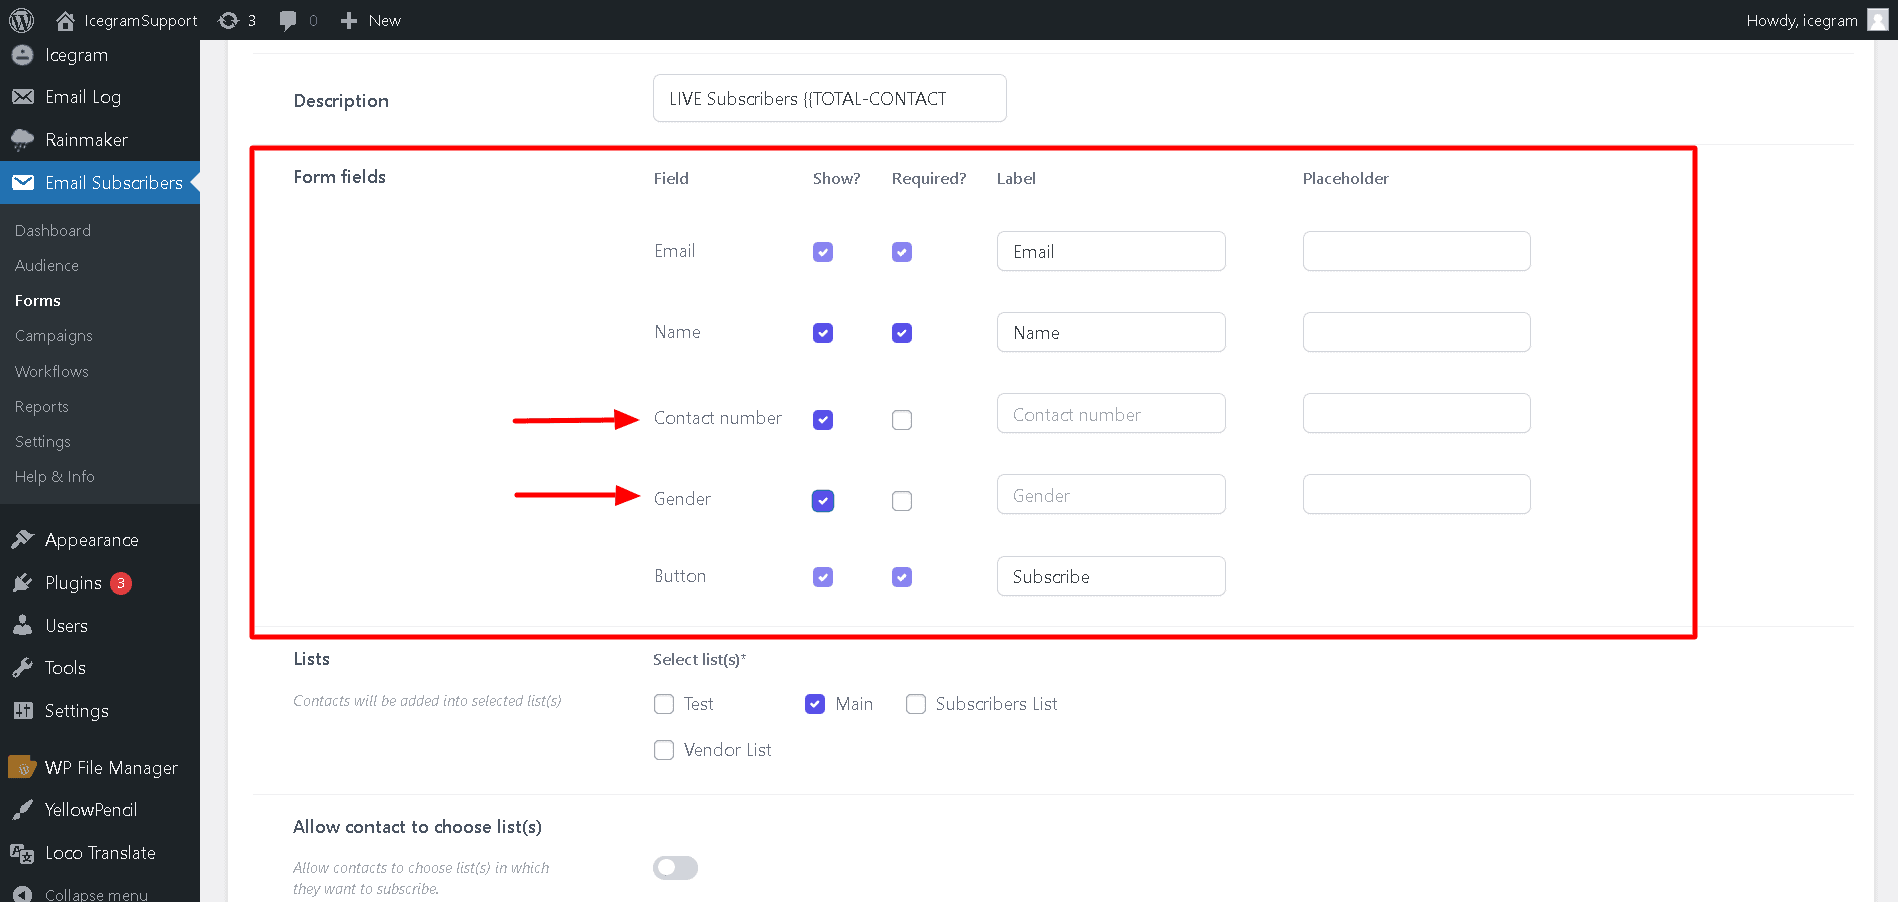
Step 5: Put the form on your site. In the above example, we have added a Radio button and a Contact field.

Step 6: To view received data from the custom field, visit the Icegram Express Audience tab. Refer to the screen recording for your reference.
Using the above steps, you can add a custom field to your form according to your respective data collecting requirements.
This feature is a part of Icegram Express Max