How to configure Mailjet to send emails in Icegram Express?
Mailjet’s tools are easy as pie and very intuitive: you design, click “send” and they take care of the rest. It is the perfect tool if you are doing email marketing (sending Newsletters for example from the Icegram Express & Newsletter Plugin).
Mailjet will help you boost your deliverability so you can focus on your core business: it allows you to forget about SMTP and server maintenance. Boosting your deliverability means that your emails will also provide you with some in-depth stats and other very useful tools that will make you’re sending more efficient.
-Create Mailjet Account
You can sign up for Mailjet here. Setup your new login credentials and click on the create an account button. Also, you can know more about their pricing plans from here. To continue setting up Mailjet with Icegram Express, you can start with a free Mailjet free plan.
-Verify Your Domain
We strongly recommend that you verify the domain or subdomain you will use for sending emails. To do so you have to go to your Account settings and add the domain you want to use for sending emails. Once the domain is successfully set up we generate an SPF and a DKIM record for you.
SPF is a DNS TXT record and acts as a filter. It is used to specify a whitelist of IP addresses. This whitelist can be queried by mail clients to see whether a sender IP is in the list.
DKIM is another DNS TXT record and contains a public key. We automatically generate a public/private key pair for you after registration. The private key is used to sign every message you send. Email clients can then check your DKIM record and use it to verify the signature. Together, SPF and DKIM form the technical basis of email deliverability.
Once your domain is verified you should add the SPF and DKIM records to your domain using the domain configuration tool of your DNS Provider.
You can refer to step-by-step user guides on creating DNS records: Click here.
-Configuring Mailjet to Send Emails
An API Key and Secret Key are secret tokens used by Mailjet to authenticate you with our servers. Your API Key and Secret Key are only known to you and Mailjet. It is important to keep both keys confidential to protect your account. The API Key and Secret Key are the values entered into the SMTP parameters when you want to send an email directly from your email client or program. Your API Key Information can be found on your SMTP Settings page.
Also, with API Keys, you are able to create sub-accounts on your Mailjet account. This allows to separate your mailings across different API Keys for easier management, account sharing, and reporting.
To create additional API Keys, simply go to your API Key Management page. For detailed instructions on creating additional API Keys, please read our Sub-Accounts FAQ.
-Configuring Icegram Express to Send Emails using Mailjet created API Key
Now that you’ve set up your DNS, you can prepare Icegram Express to start using Mailjet for sending emails.
Step 1: Install and activate the Max version of the Icegram Express plugin
Step 2: Navigate to Icegram Express > Settings page.
Step 3: At the top of this page, you can set the From Name and From Email. By default, these will be filled with your site’s name and admin email.
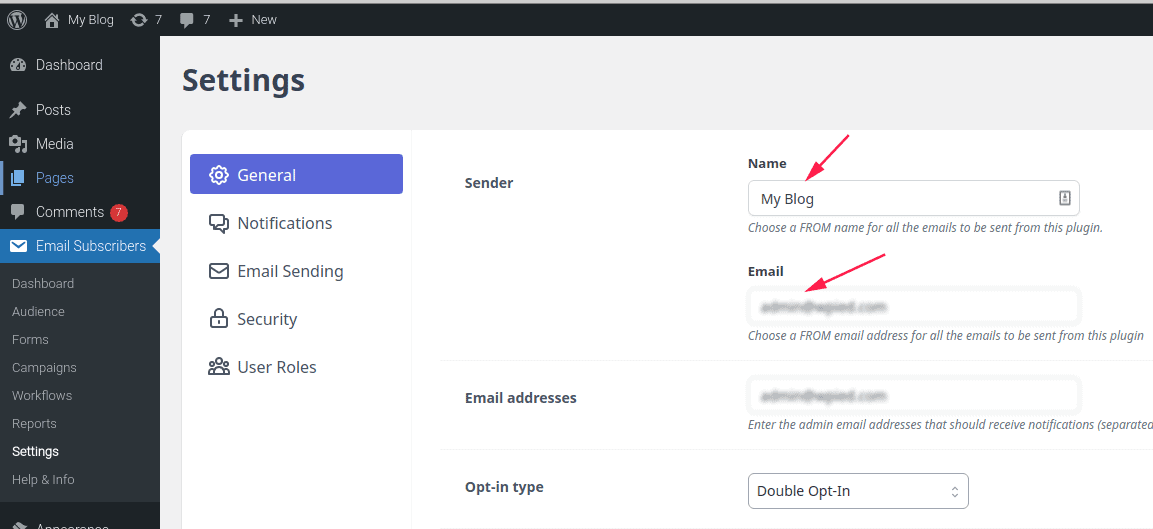
Step 4: For the From Email, use an email address associated with your verified domain from Step 3
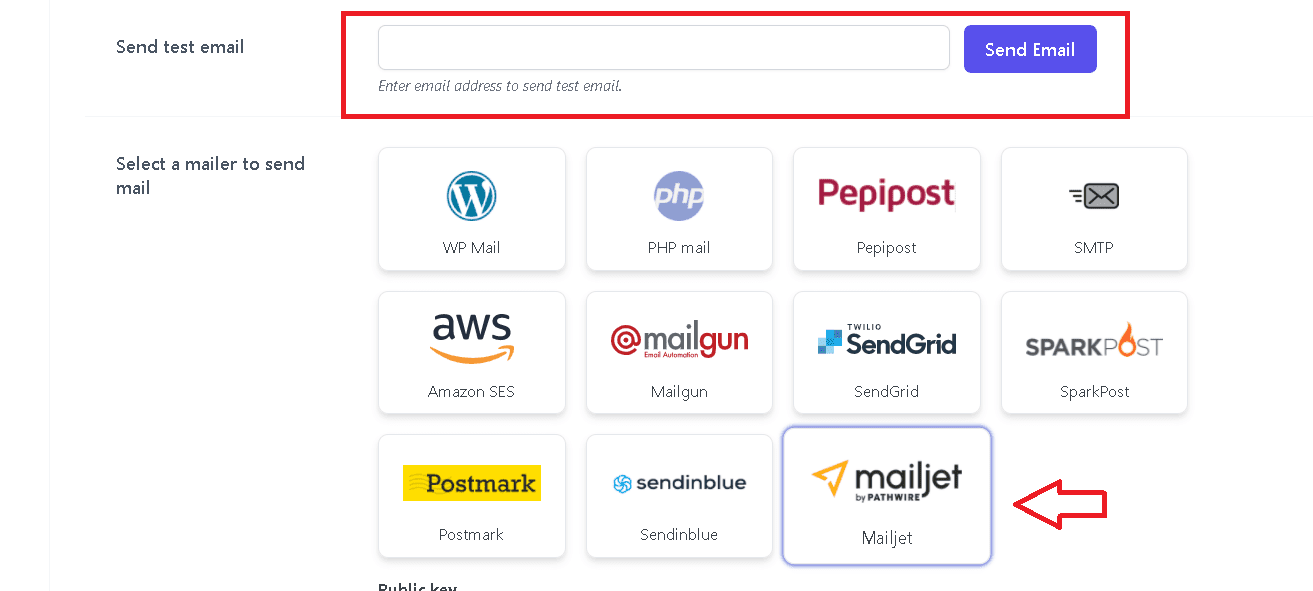
Step 5: Now click on the Email Sending tab and scroll down to the option Select a mailer to send mail and click on Mailjet as the mailer. Now that you’ve selected Mailjet as your mailer, a new section will appear below the Mailers list. Here, you’ll need to enter API and Region information.Enter the API Key created from Step 4.
Step 6: Once this information is added, click on the Save Settings button at the bottom.
-Send a Test Email
Once your domain is verified and your settings have been added to Icegram Express, it’s important to send a test email to ensure that everything is working as expected. You can try sending a test email from the option provided just above the Select a mailer section.
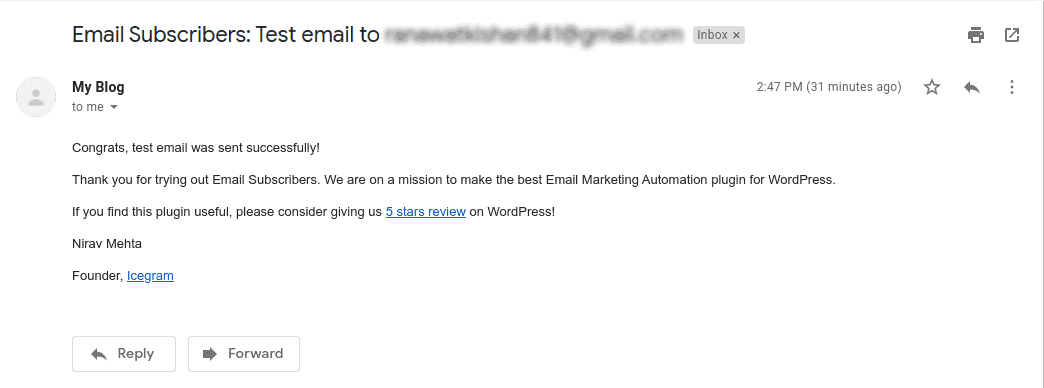
You can enter any email address that you have access to and click the Send Email button. After sending the email, you should see a success message.
If you check the inbox for that email address, you should receive the email for this test.