How to Handle Bounced Email Addresses in Icegram Express?
Have you observed that a certain percentage of emails do not reach the recipients at all or the mail delivery fails while sending an email? You may be wondering, what went wrong? Wasn’t the mail good enough? Or maybe the email content was marked as spam? Is there an issue with the internet connection? And hence, curiosity increases in order to understand the cause.
So, considering issues such as email not reaching the receiver’s mailbox which can be caused by many reasons such as typing mistakes in the email address, an inbox full of emails can cause a delivery failure for your beautifully crafted email, or the receiving server could be down, or any error somewhere in the channel can be the reason for the issue.
How can we solve this Email Delivery problem?
Now the process of monitoring the email addresses for such delivery failures can be quite a hassle and so with a mission of simplifying this process for you, we have released the ‘Email Bounce Handling‘ feature. It will notify you; of the following email addresses from where the emails are bounced back. Bounce back emails are those emails that are not delivered to the respective recipients/subscribers due to any technical issue.
We categorize bounces into two types: hard bounces and soft bounces.
- Soft bounce: It is a temporary delivery failure that occurs for a variety of reasons such as the mailbox is full, recipient email server is down or offline, email is too big, email is deferred, email message blocked due to content, email message does not meet the recipient server’s policies, email cannot be relayed for unknown reasons, email message does not meet the recipient server’s sender requirements, etc.
- Hard bounce: It is a permanent delivery failure that occurs because the recipient’s email address is invalid or no longer in use. Typically, the domain name no longer exists or it no longer has registered mail servers, or the recipient’s email server has completely blocked delivery, the email address can also be invalid due to typos, for example, hotmil instead of hotmail.
How does email bounce handling work with Icegram Express?
The bounce handling feature will scan your list of subscribers and highlight the email addresses that are bounced back to you as soft bounce & hard bounce.
Once the hard bounces and soft bounce are marked, you can easily sort them manually by removing the hard bounces and filtering the soft bounces.
Bounced handling feature does not remove the bounced addresses automatically, it just marks and highlights the addresses as per their type of bounces. We can manually remove or edit the required email addresses once we are aware of the hard and soft bounces.Whereas this feature is crafted for the Max plan users.
Handling bounced emails carefully will protect your domain’s reputation and save your email sending bandwidth with less damage to your email sending profile.
Why do you have to worry about bounces? It will help you to reduce the usage of server resources and costs that are spent for bounced email addresses.
Also, it helps to maintain healthy email lists which are organic, owing to the actual reachable audiences. Majorly, for removing the non-existent addresses which will save time and effort.
Where can you find Bounce Email in Icegram Express?
Step 1 Navigate to Icegram Express > Audience.
Step 2 On the Audience screen, you will find a bounce status indicator beside the contact name and email details.
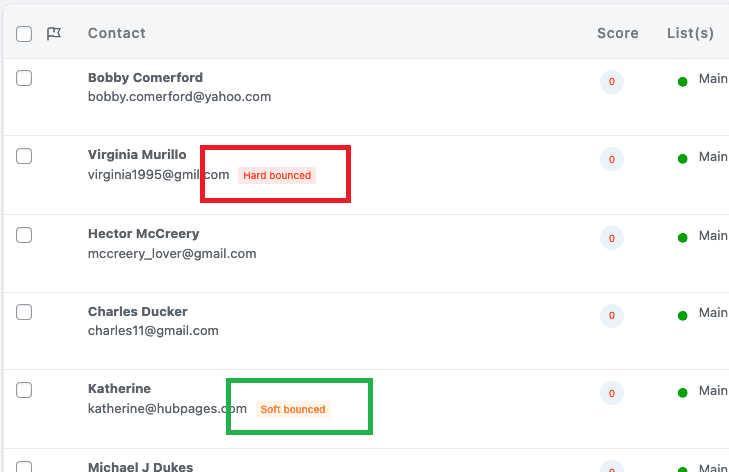
Step 3 As we can see in the above Screenshot, Hard bounce and Soft Bounce are highlighted in the Audience Page in the contact column.
How can you enable bounce handling features in Icegram Express?
In order to enable the feature, you just have to update the Icegram Express plugin to the version (4.9.0) and above. Additionally, if you are using some Email Service Providers (ESPs) supported by the Icegram Express such as Mailgun, SendGrid, SparkPost, Postmark, SMTP or Pepipost; then, you have to add a given webhook in the plugin.
The process can be done by copying the Bounce Webhook URL that is mentioned in the below settings of the respective mailers. Once the URL is copied, you have to paste it into your respective mail service provider’s account. Refer to the screenshot mentioned below.
You can check the below videos in order to link Icegram Express into your respective mailer accounts;