Audience, Lists & Statuses
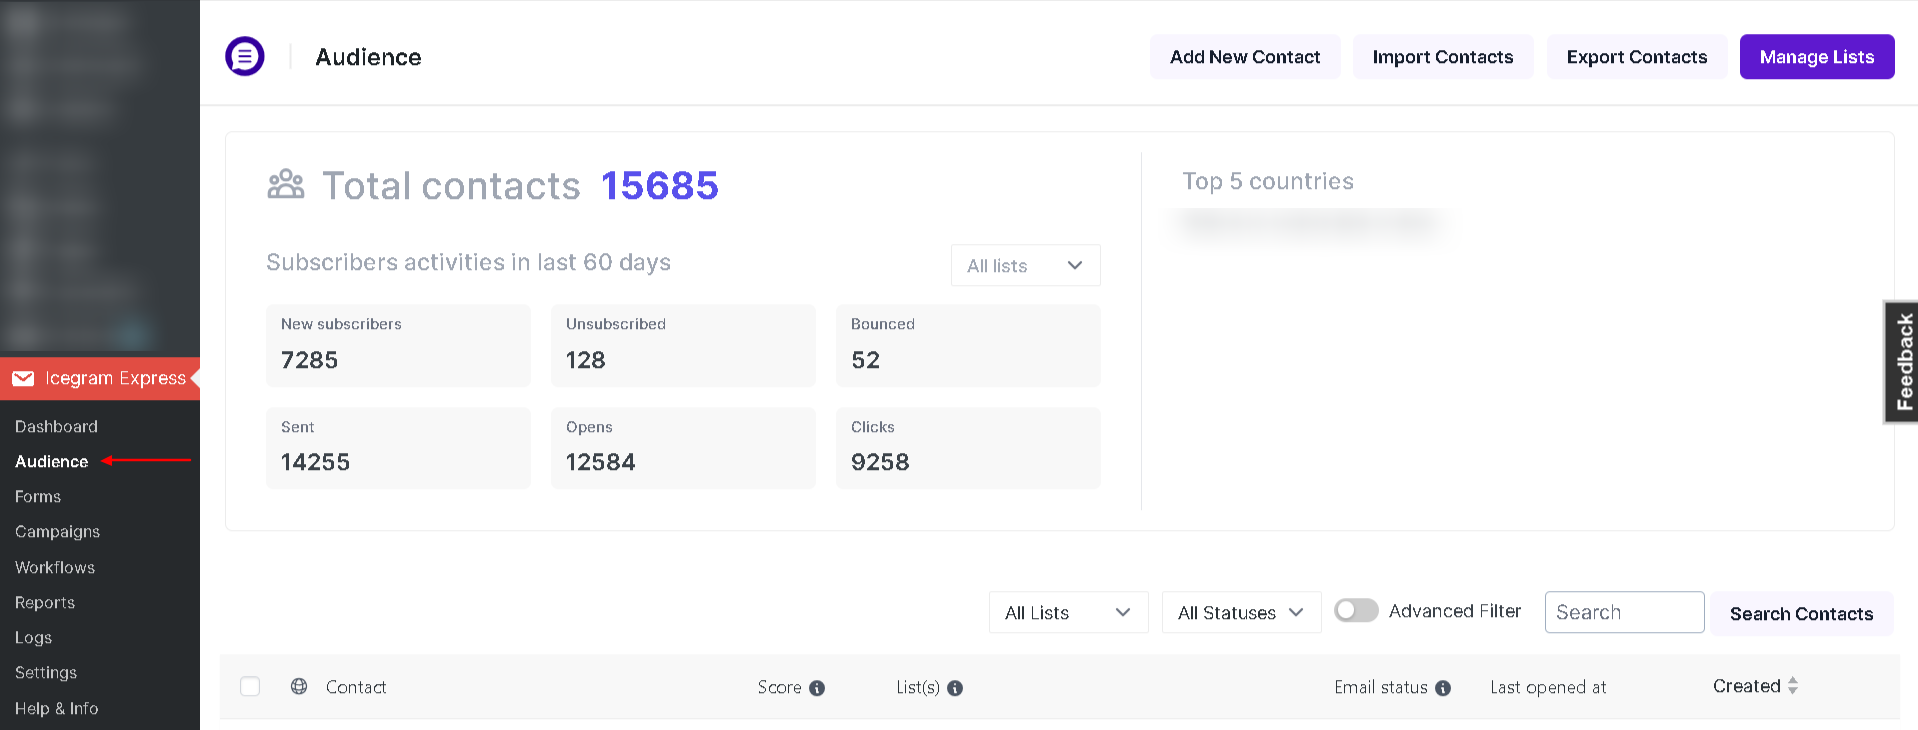
Audience
An Audience is a group of individuals, or a specific list at which a campaign is targeted. It’s also who would be most likely to convert, based on each email campaign you run/send.
For example, if you own an automobile magazine, your target audience would be automobile owners and enthusiasts.
It’s important to understand that the target audience is who is most likely to purchase your goods or services and not necessarily for whom the goods and services are intended so in the above example those who are interested in automobiles are also the audience.
Lists
A list is a collection of email addresses that you have received through the subscription form or other ways like contact import or Workflows. The Audience page comprises one or more lists with contacts of different statuses.
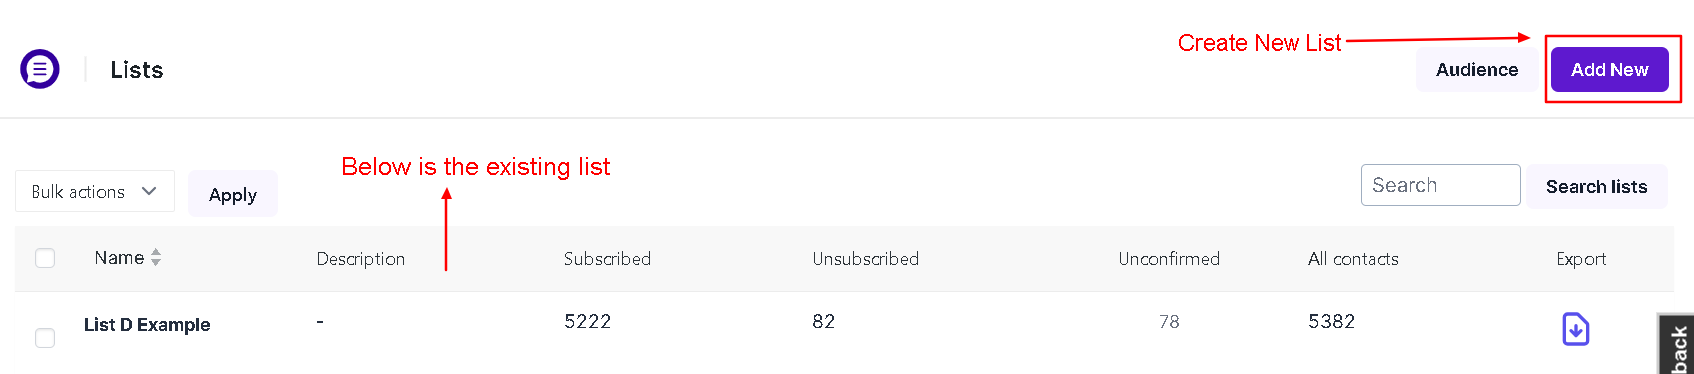
Creating a list
Administrators can create Lists to categorize contacts so as to target the right audience while creating campaigns.
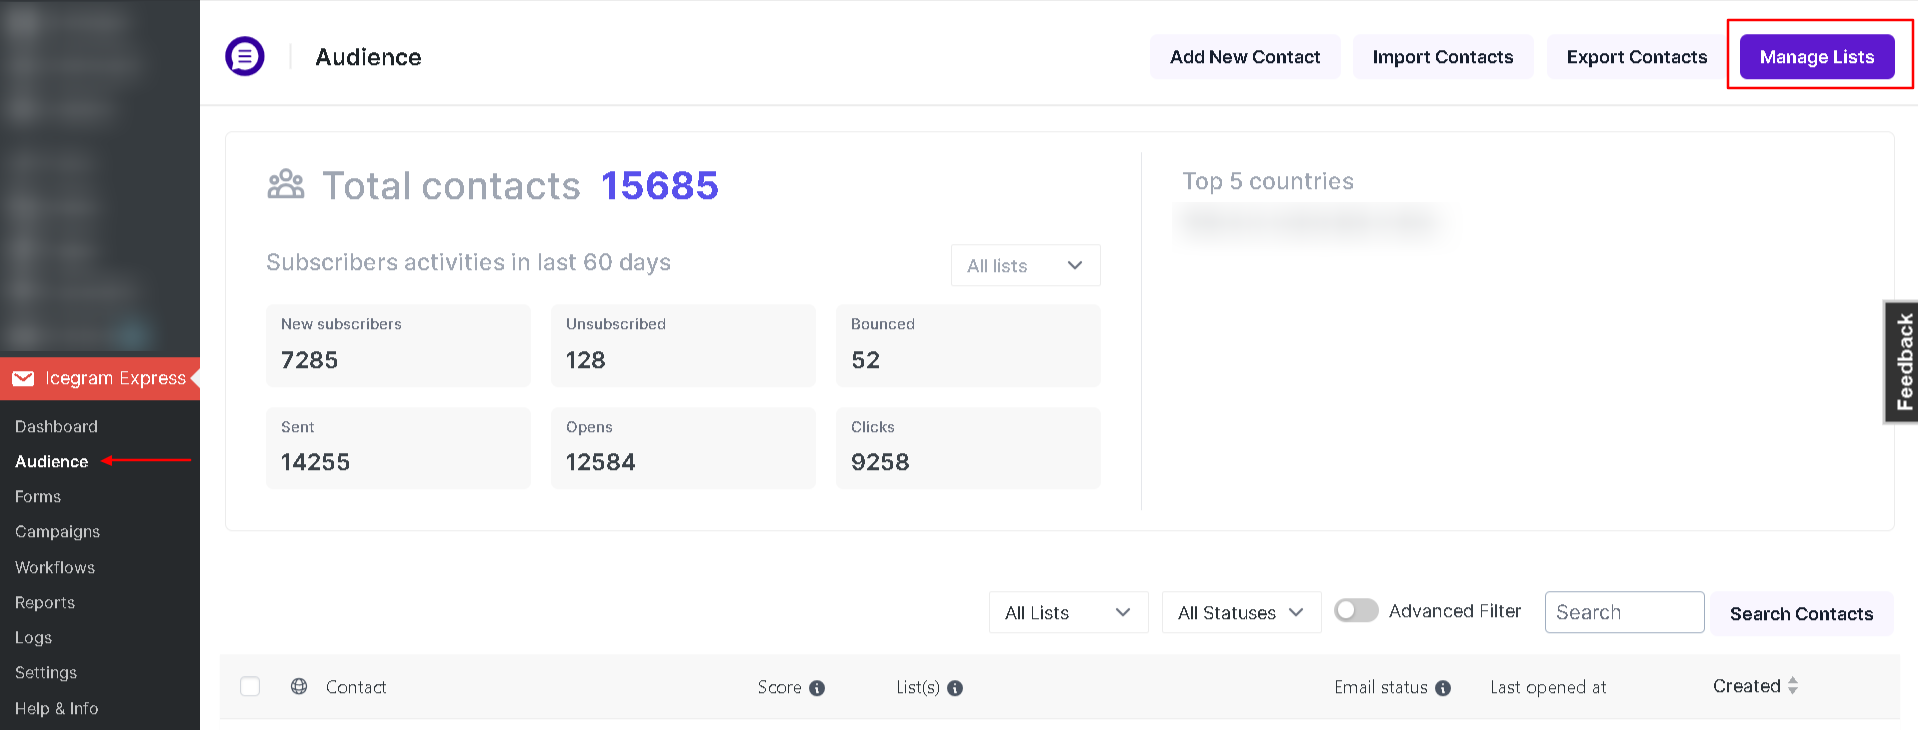
Step 1: Navigate to Icegram Express > Audience > Manage Lists in the WordPress Admin panel
Step 2: Click on Add New
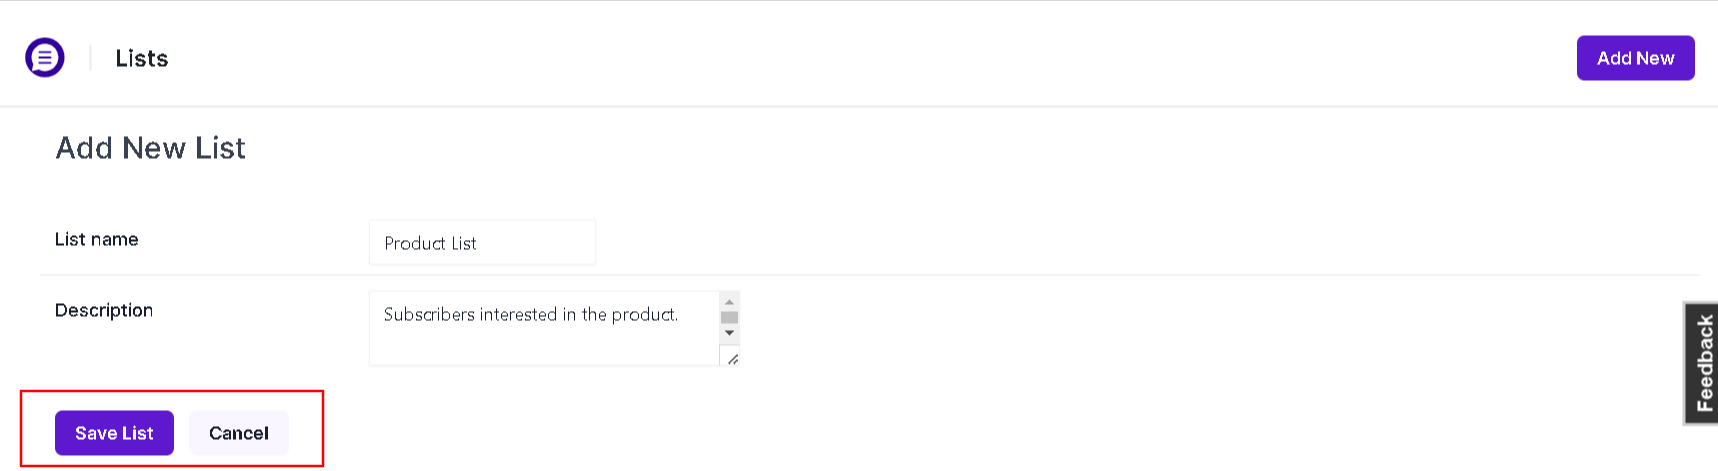
Step 3: Then give the new list a name and click Save List
Moving subscribers to another list
The Icegram Express plugin allows you to move contacts/subscribers from one list to another. For example, you can move all or selected contacts from bikes to cars so that they receive emails targeting the "cars" list, but not the "bikes" list.
To move contacts,
Step 1: Go to Icegram Express → Audience from the left navigation menu on your WordPress setup
Step 2: Select whom you want to move or check the "Select all" options on the top
Step 3: Select Move to list from the bulk-actions dropdown
Step 4: Select the new list name you have just created from the next dropdown
Step 5: Finally, click Apply to update the list for selected subscribers
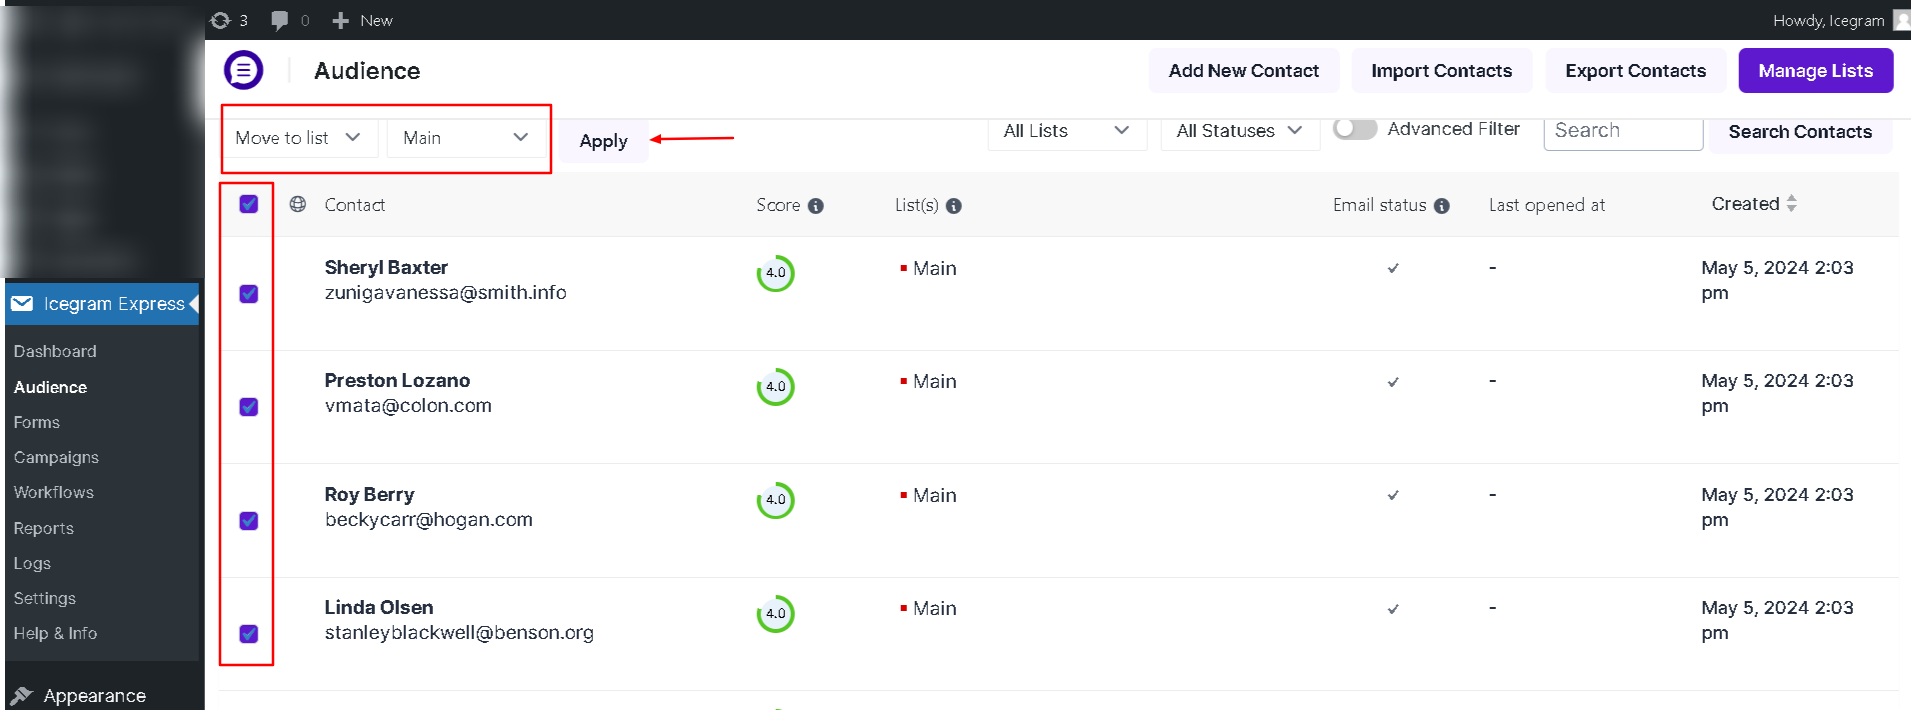
Move to list will remove subscribers from the list they were on and update the list that is selected
Adding subscribers to the list
Icegram Express plugin allows you to move contacts/subscribers from a list they already subscribed to another list. For example, you can move all or selected contacts from bikes to cars so that they receive emails targeting any of the two lists.
Step 1: Go to Icegram Express → Audience from the left navigation menu on your WordPress setup
Step 2: Select whom you want to add to a new list or check the "Select all" options on the top
Step 3: Select Add to list from the bulk-actions drop down
Step 4: Select the new list from the next dropdown
Step 5: Finally, click Apply to save the changes
This will not affect the original list
Statuses
Icegram Express highlights contacts in three statuses. They are:
Subscribed: Contacts who verified confirmation emails (in case your subscription method is double opt-in) or contacts imported with the Subscribed status are called Subscribers. These are the people who you can target your campaigns to. Subscribed contacts' status is always green.
Unconfirmed: Contacts who haven't verified their subscription are seen with the yellow status. They are yet to confirm their email addresses.
You can either resend the confirmation email to individual contacts or turn them into Subscribers by manually changing their status to Subscribed.
Unsubscribed: Contacts who don’t want to receive updates. Their status turns into red after unsubscribing using the unsubscribe-link.
They can choose to unsubscribe from a specific list or entirely.
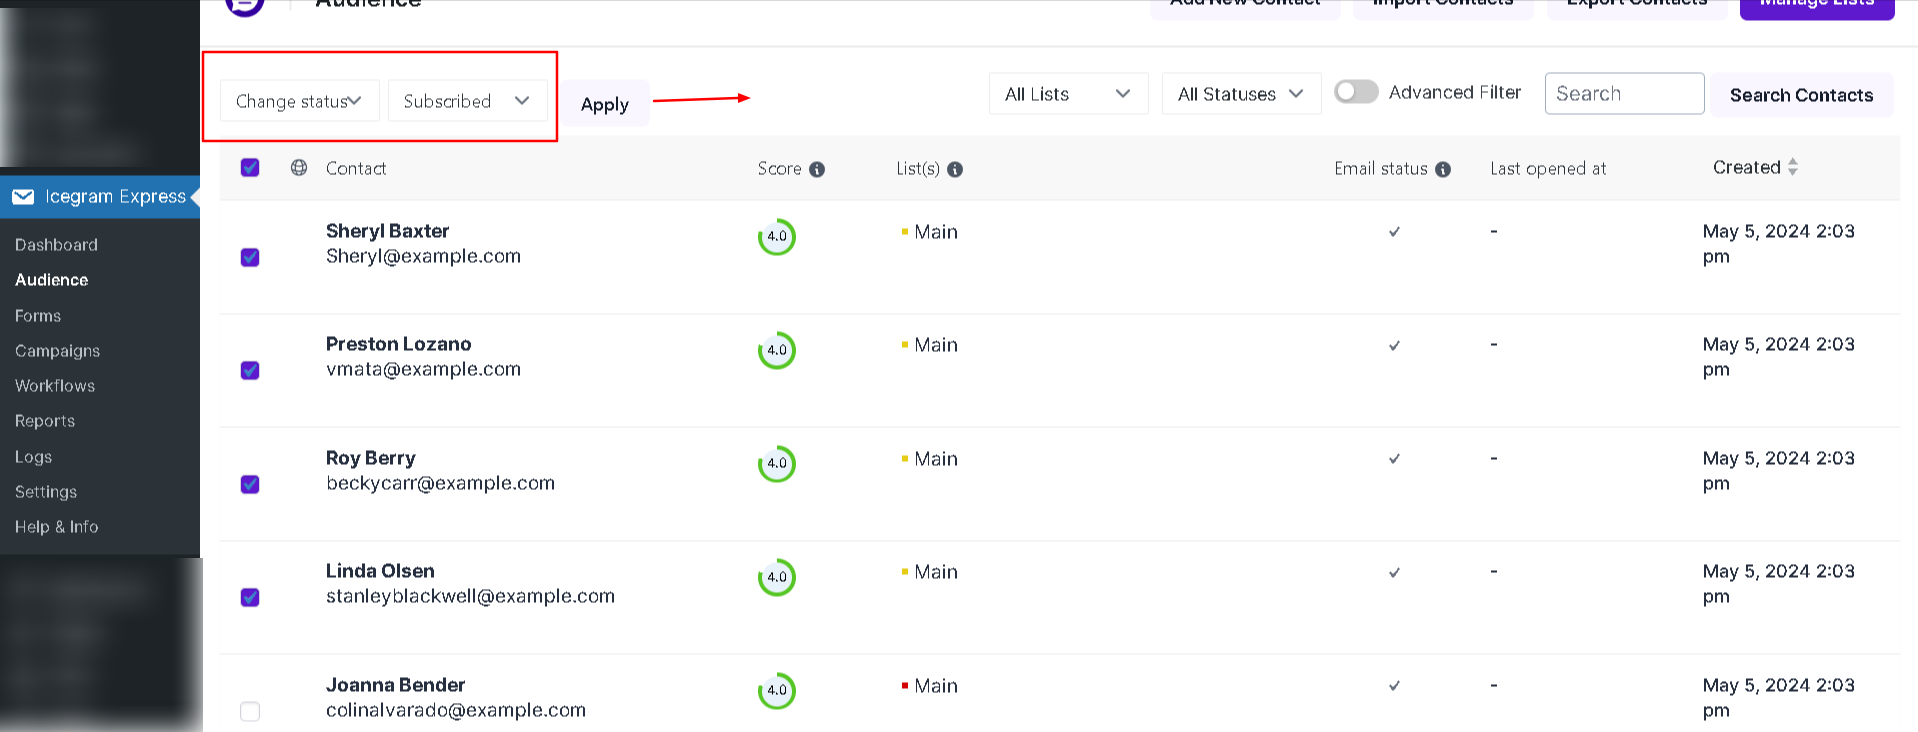
Updating the status of contacts
The plugin allows you to change the status of one or more contacts at any time. For example, you can change the status of a selected contact from Unconfirmed to Subscribed or from Subscribed to Unsubscribed and vice-versa.
To change the status,
Step 1: Go to Icegram Express → Audience
Step 2: Select subscribers whose status you want to update
Step 3: Select Change Status from the bulk-actions dropdown
Step 4: Select the status from the next dropdown
Step 5: Finally, click Apply to update the contact(s) status