How to Schedule Cron Emails in Parallels Plesk
This article explains how to setup / schedule cron emails for Icegram Express in Parallels Plesk.
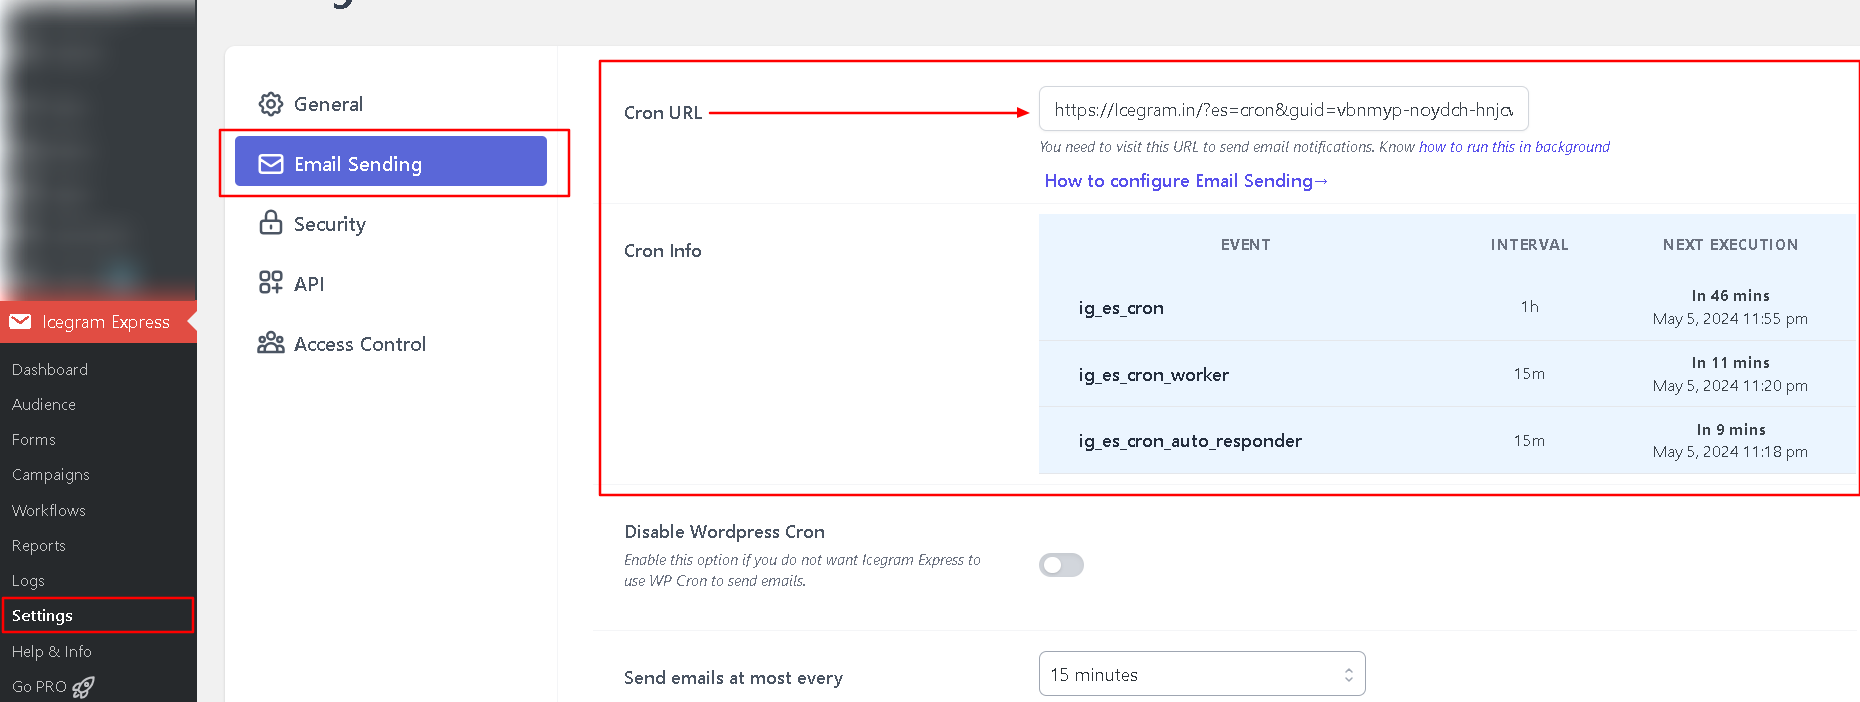
Where to find my Cron URL for Icegram Express?
To find your cron URL, go to WordPress Dashboard -> Icegram Express -> Settings -> Email Sending -> Cron job URL
Steps to setup Cron in Parallels Plesk
Step 1 : Login to your Parallels Plesk. If you don’t have login information, please contact your hosting and get one for you.
Step 2 : Go to the Domains or Websites & Domains section.
Step 3 : Now select the domain where you want to add the cron job.
Step 4 : Click on Scheduled Tasks under Additional Tools.
Step 5 : Select the System user under whom you want to run the scheduled task.
Step 6 : Click Schedule New Task.
Step 7 : Specify the time when you want to run some specific command.
Minute — enter the value from 0 to 59
Hour — enter the value from 0 to 23
Day of the Month — enter the value from 1 to 31
Month — enter the value from 1 to 12, or select the month from a drop-down box
Day of the Week — enter the value from 0 to 6 (0 for Sunday), or select the day of the week from a drop-down box.
You can schedule the time using the crontab entry format.
Enter several values separated by commas. Two numbers separated by a hyphen mean an inclusive range. For example, to run a task on the 4th, 5th, 6th, and 20th of a month, type 4-6, 20.
Insert an asterisk to specify all values allowed for this field. For example, to run a task daily, type * in the Day of the Month text box.
Step 8 : Finally enter your CRON URL in the Command text box. Please find the syntax below.
/usr/bin/wget -O – -q http://www.yourwebsite.com/?es=cron&guid=evnloh-eqotdy-fmswkp-oqwlgp-gbuzak
Don’t forget to replace http://www.yourwebsite.com/?es=cron&guid=evnloh-eqotdy-fmswkp-oqwlgp-gbuzak with your own Cron URL of Email Subscribers.
If you have no idea about this command, it is advised you contact your hosting. They will help you to schedule the job (Provide your cron URL to them along with the above instructions, they will schedule the Cron job for you).
Click on OK once you have entered the command.
Step 9 : Success! The new cron task has been successfully set up.
Recommended Reading
Leave the worry of setting up Cron on us. Get Starter Plan now. We will take care of it.